🛠️ Overview
This project is all about creating a smart home dashboard that feels like a natural part of your living space.
Instead of using a traditional screen or tablet that needs constant power and emits light, I built a dashboard using ePaper — the same technology used in e-readers. It’s perfectly suited for displaying static information like temperature, weather, or sensors status because it consumes nearly no power when idle, is always readable (even in sunlight), and looks more like paper than a screen.
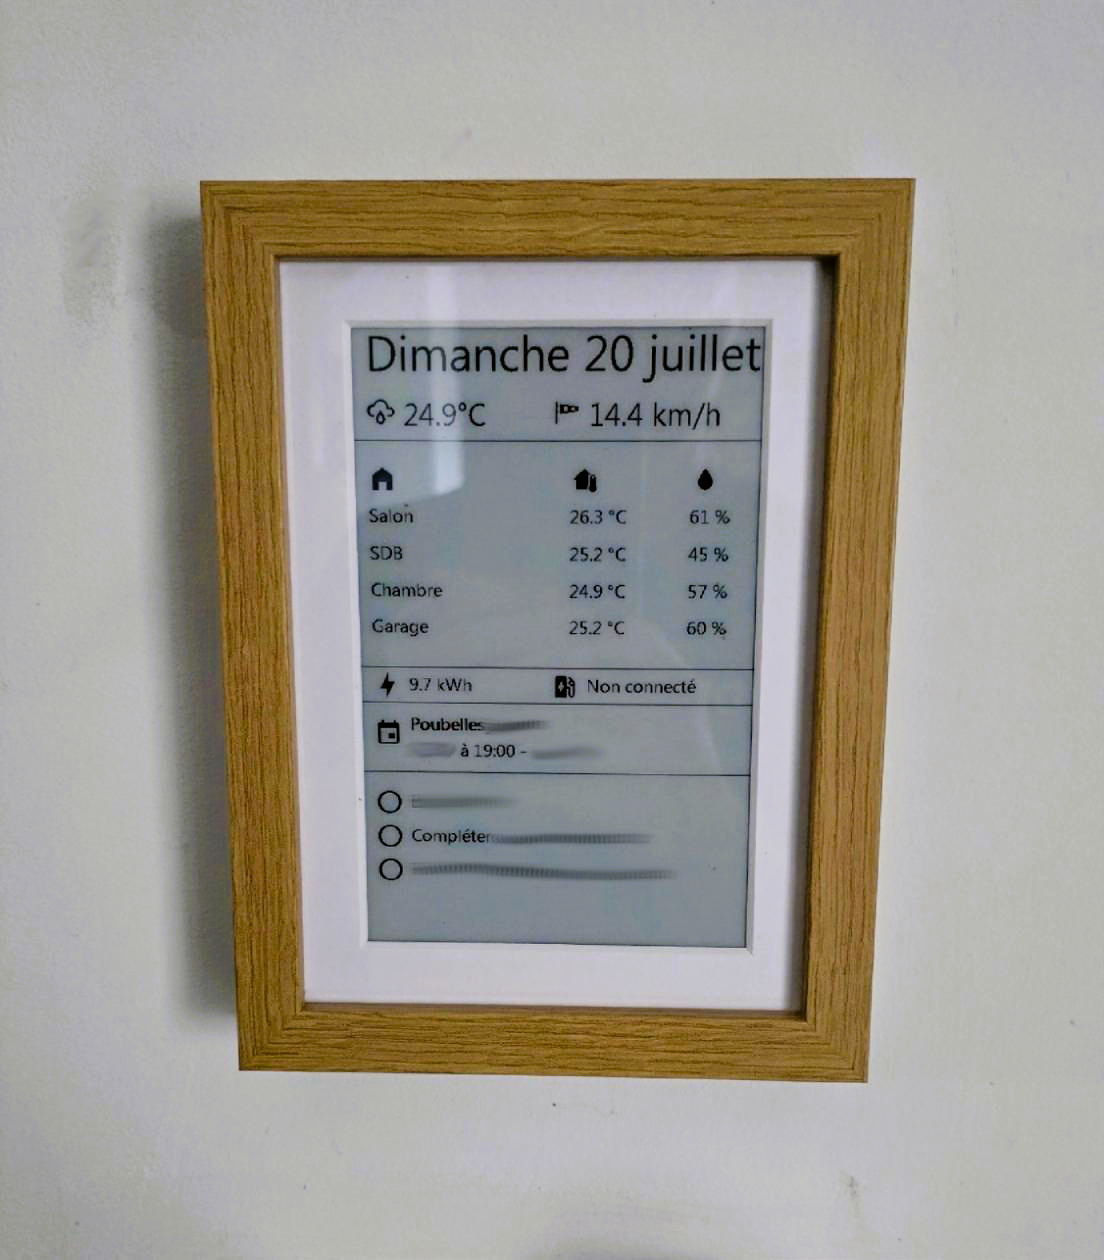
To make it blend into the home, I framed the display inside a standard photo frame, making it look like a decorative element rather than a piece of tech. There are no visible cables, no glowing screen — just a calm, elegant display that updates periodically and provides useful information at a glance.
This setup combines minimalism, low energy consumption, and seamless integration into the home, turning a functional dashboard into a beautiful and subtle object.
🧰 Materials Needed
- Waveshare 7.5” ePaper display (with ESP32 driver board)
- 3.7V 18650 Lithium-ion battery
- MT3608 DC-DC step-up module
- TP4056 charging module (with protection)
- Power Buttton 5mm
- Wires and a switch
- IKEA RÖDALM 13x18 frame
- Custom 3D printed chassis (STL file provided below)
- Home Assistant instance with ESPHome or MQTT
- USB-C cable for flashing and charging
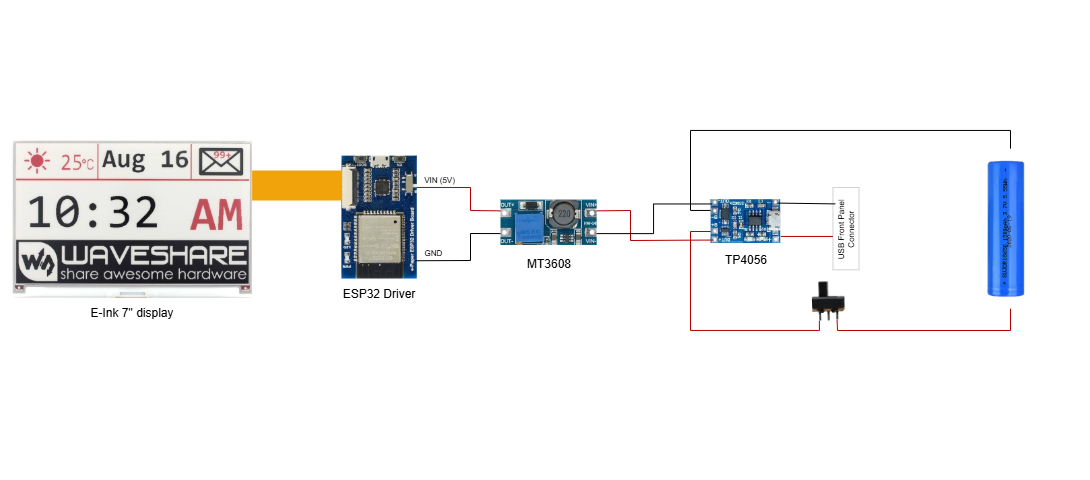
🛠️ Wire the Power Circuit
- Connect the TP4056 module to the battery.
- Connect its output to the MT3608 module.
- Set MT3608 output to 5V using a multimeter and potentiometer.
- Power the ESP32 from the 5V output of MT3608.
⚠️ Warning: ePaper displays are sensitive — use stable voltage.
💻 Software Installation (ESP32 + ESPHome)
The ESP32 needs to be flashed with firmware to connect to Home Assistant and update the ePaper display.
This project uses ESPHome, which makes integration with Home Assistant simple and efficient.
-
Install ESPHome
- Use the ESPHome dashboard in Home Assistant or install the ESPHome CLI on your computer.
-
Download the YAML configuration
- The provided ESPHome YAML contains anonymized sensor values (e.g., temperature sensors, text sensors, calendar, EV status).
- You must replace those
sensor:andtext_sensor:entity_ids with the ones matching your own Home Assistant setup.
-
Flash the ESP32
- Connect the ESP32 via USB to your computer.
- Flash the YAML using ESPHome (via USB the first time, then over Wi-Fi).
-
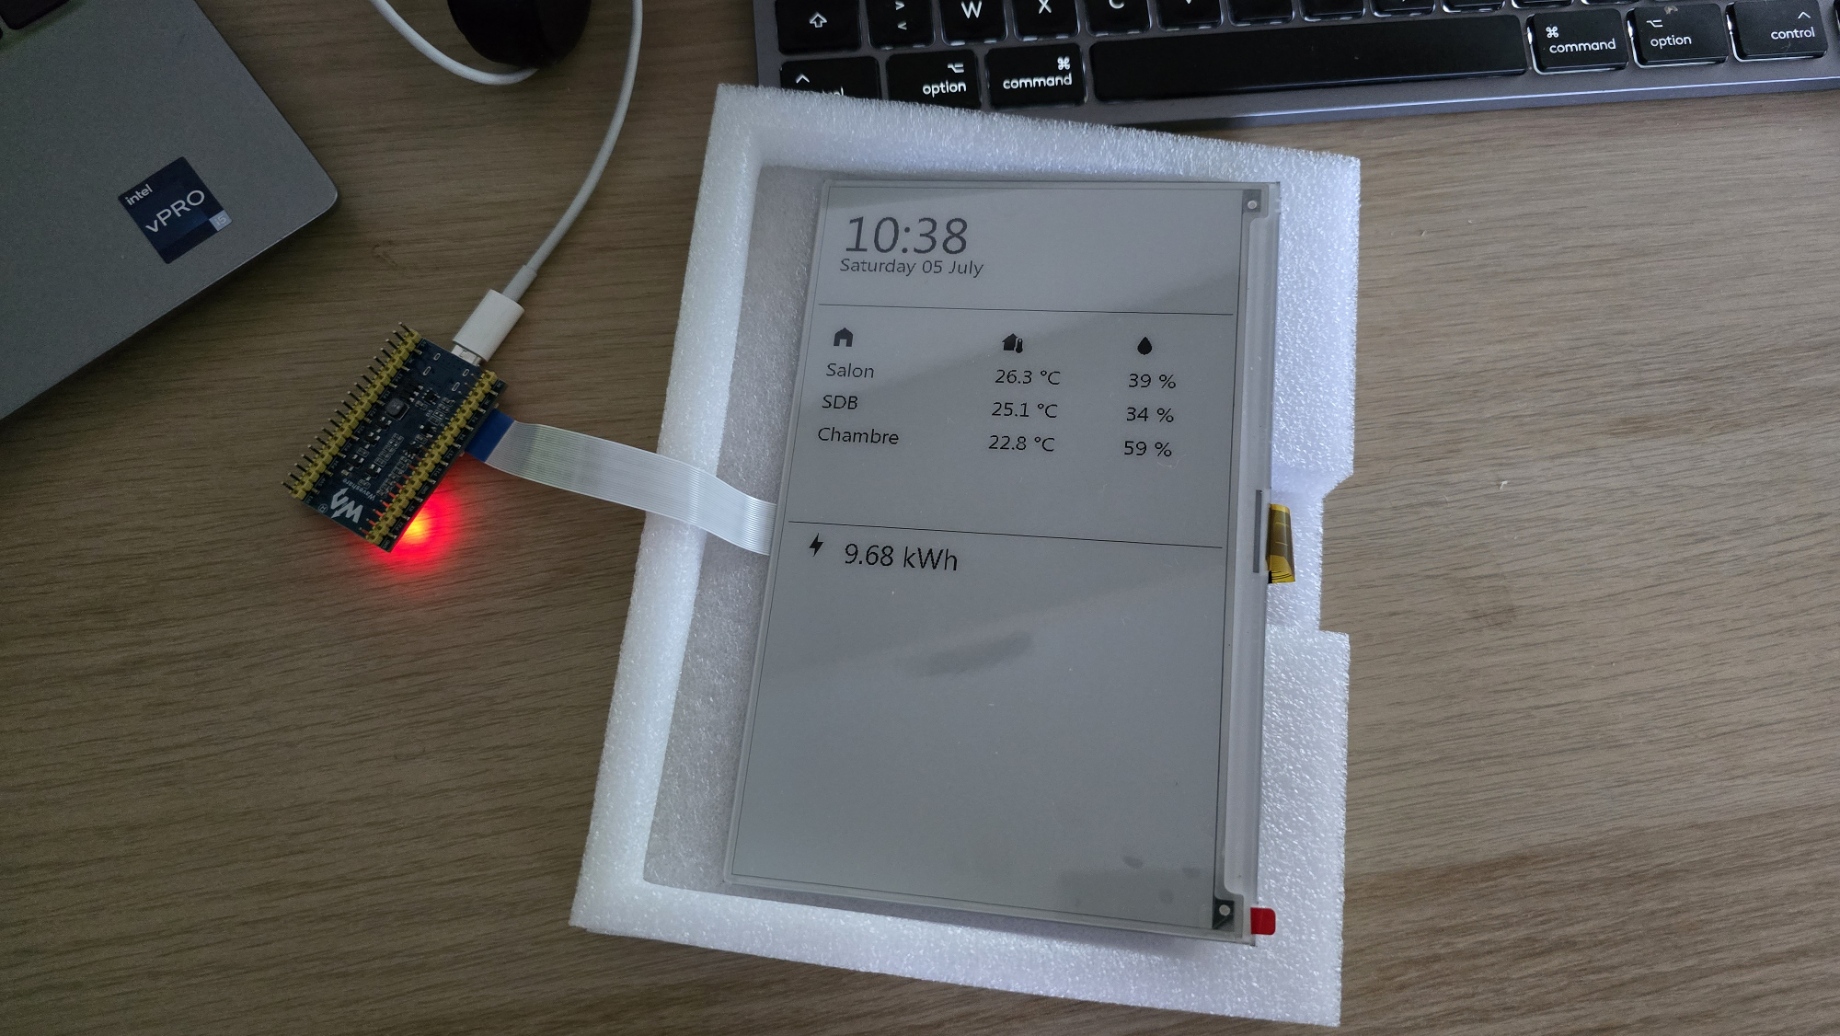
Test the display
- After flashing, the ESP32 should connect to Wi-Fi, retrieve data from Home Assistant, and render it on the ePaper screen. You should see the dashboard content appear within a minute (depending on update interval).
🖨️ 3D-Printed Chassis
The chassis is designed to integrate all components into a single compact block that fits perfectly inside the IKEA RÖDALM frame.
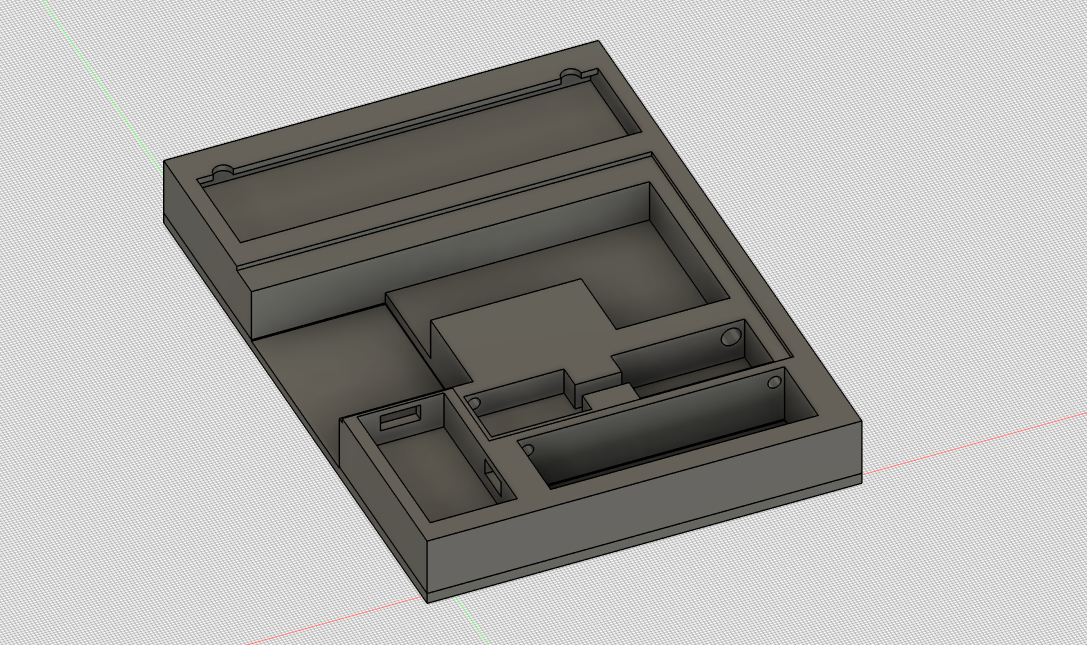

You can download the model from Thingiverse and adapt it to your specific components if needed.
👉 Download the model on Thingiverse
🧱 Assembly Instructions
- Print all pieces using PLA or PETG (0.2 mm layer height recommended).
- Glue the ePaper holder to the main chassis body (use superglue or epoxy).
- Insert all electronic components into their dedicated slots (ESP32, battery, MT3608, TP4056, etc.).
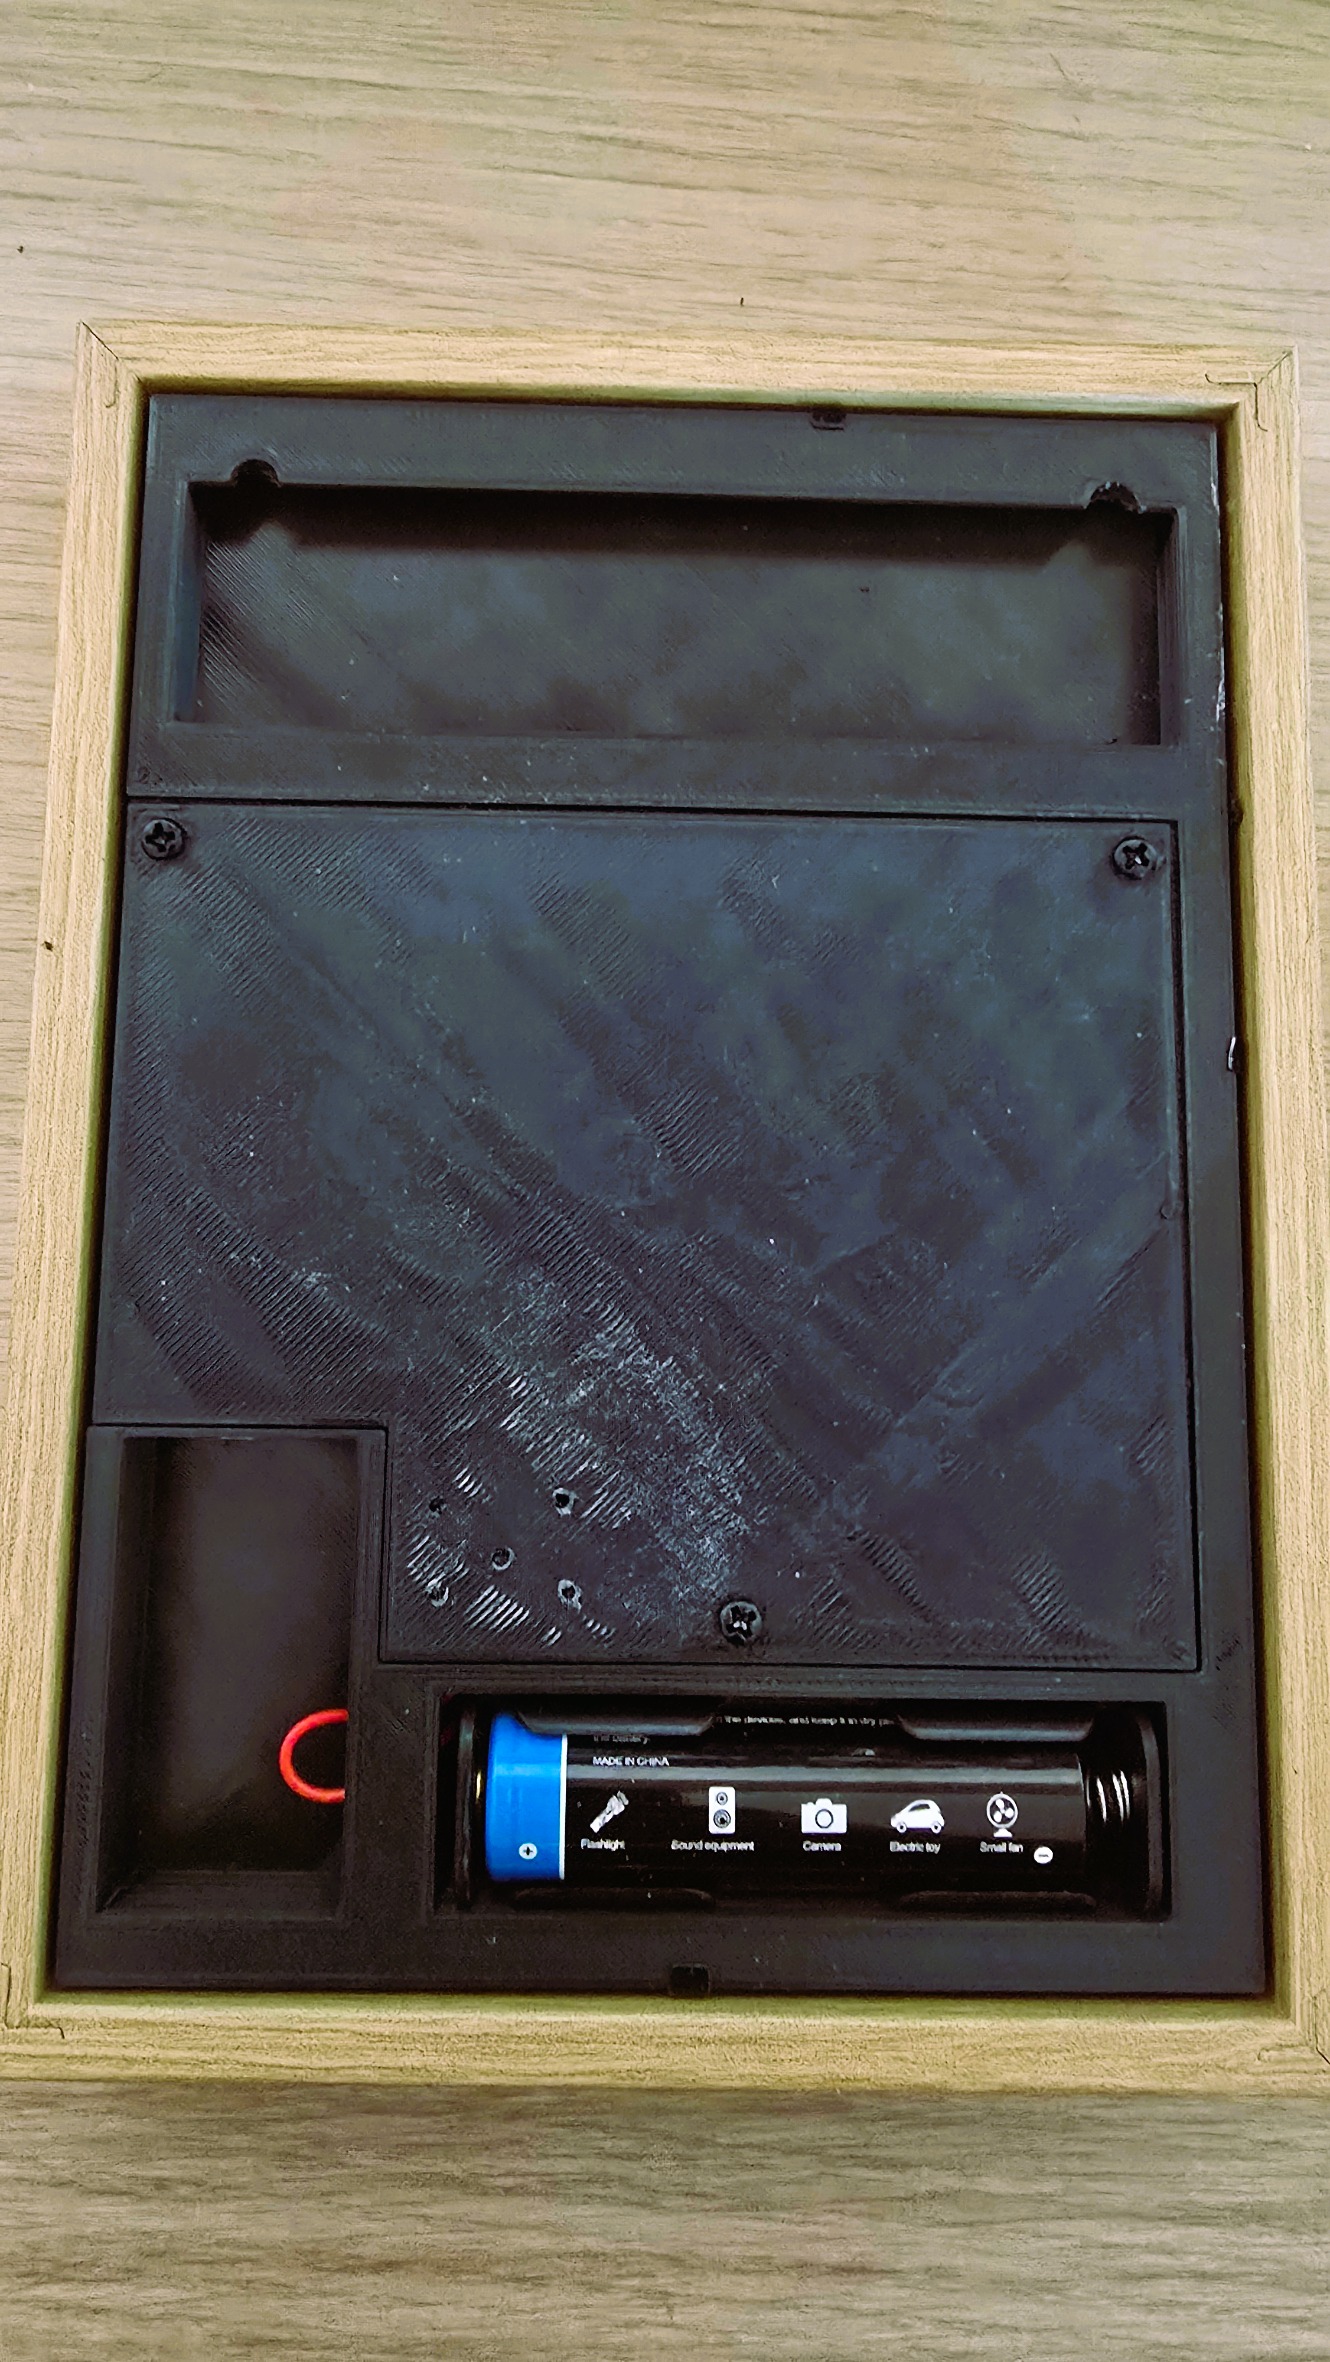
- Fix the back cover using four M3×5 mm screws.
- The result is a compact, self-contained unit that slides neatly into the frame with no visible wiring.
- Insert the ePaper display and ESP32 into the printed chassis.
- Secure the battery and power modules.
- Slide the assembly into the IKEA RÖDALM frame.
- Test it before closing everything up.
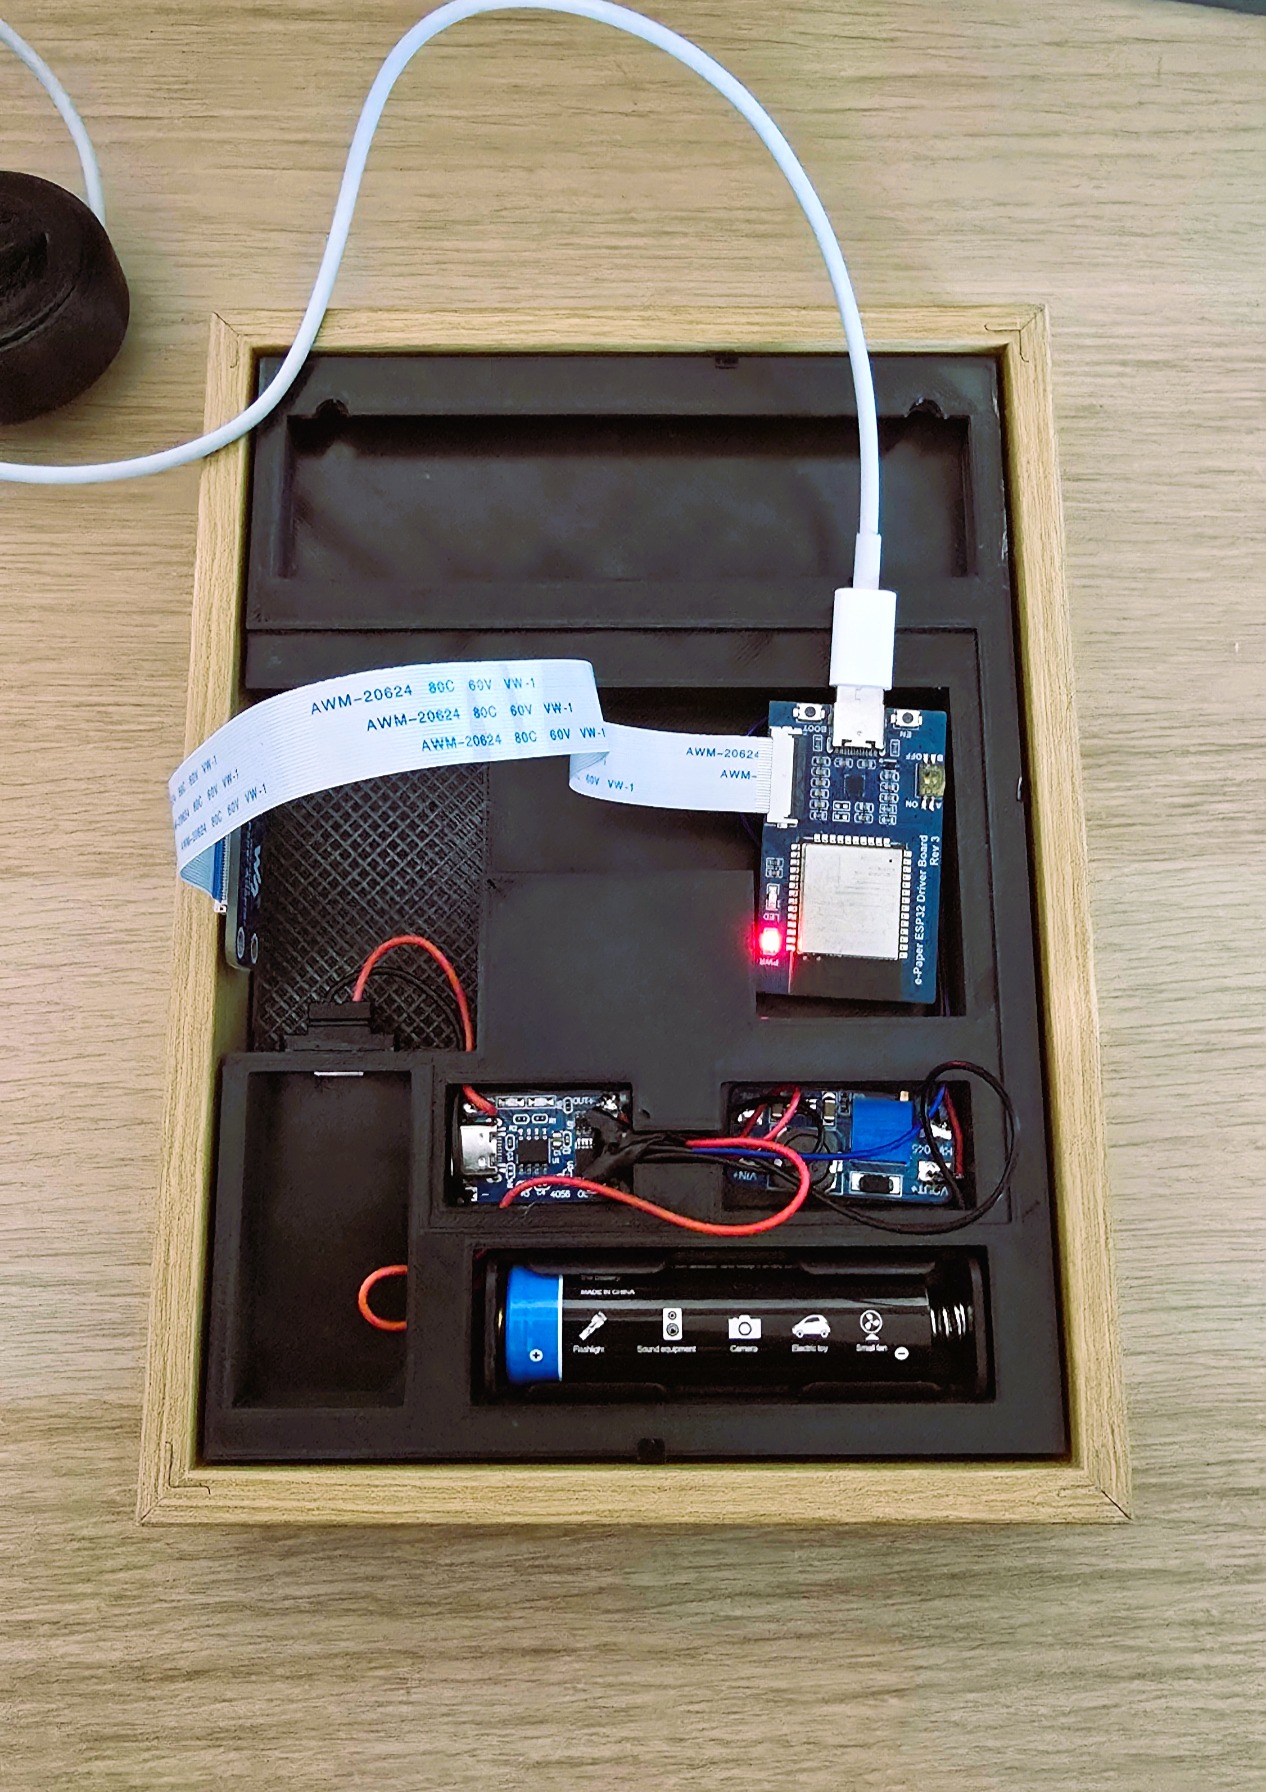
The red wire still visible is to prepare the installation of the power button.
🎨 Final Touch
Hang it like a photo frame, or place it on a desk. It blends into your interior and keeps your home stats visible without a glowing screen.