As my wedding day approached, I found myself searching for ways to make the celebration truly special and memorable. Amidst all the planning and preparation, I asked myself– why not build a photobooth? It seemed like the perfect way to add a touch of personalized fun to our big day while creating lasting memories for ourselves and our guests.
This article demonstrate how it has been built and with which components (hardware & software).
Bill Of Material
To build this photobooth, several components were required:
- Raspberry PI 4 - 4 Go: The brain of the photobooth.
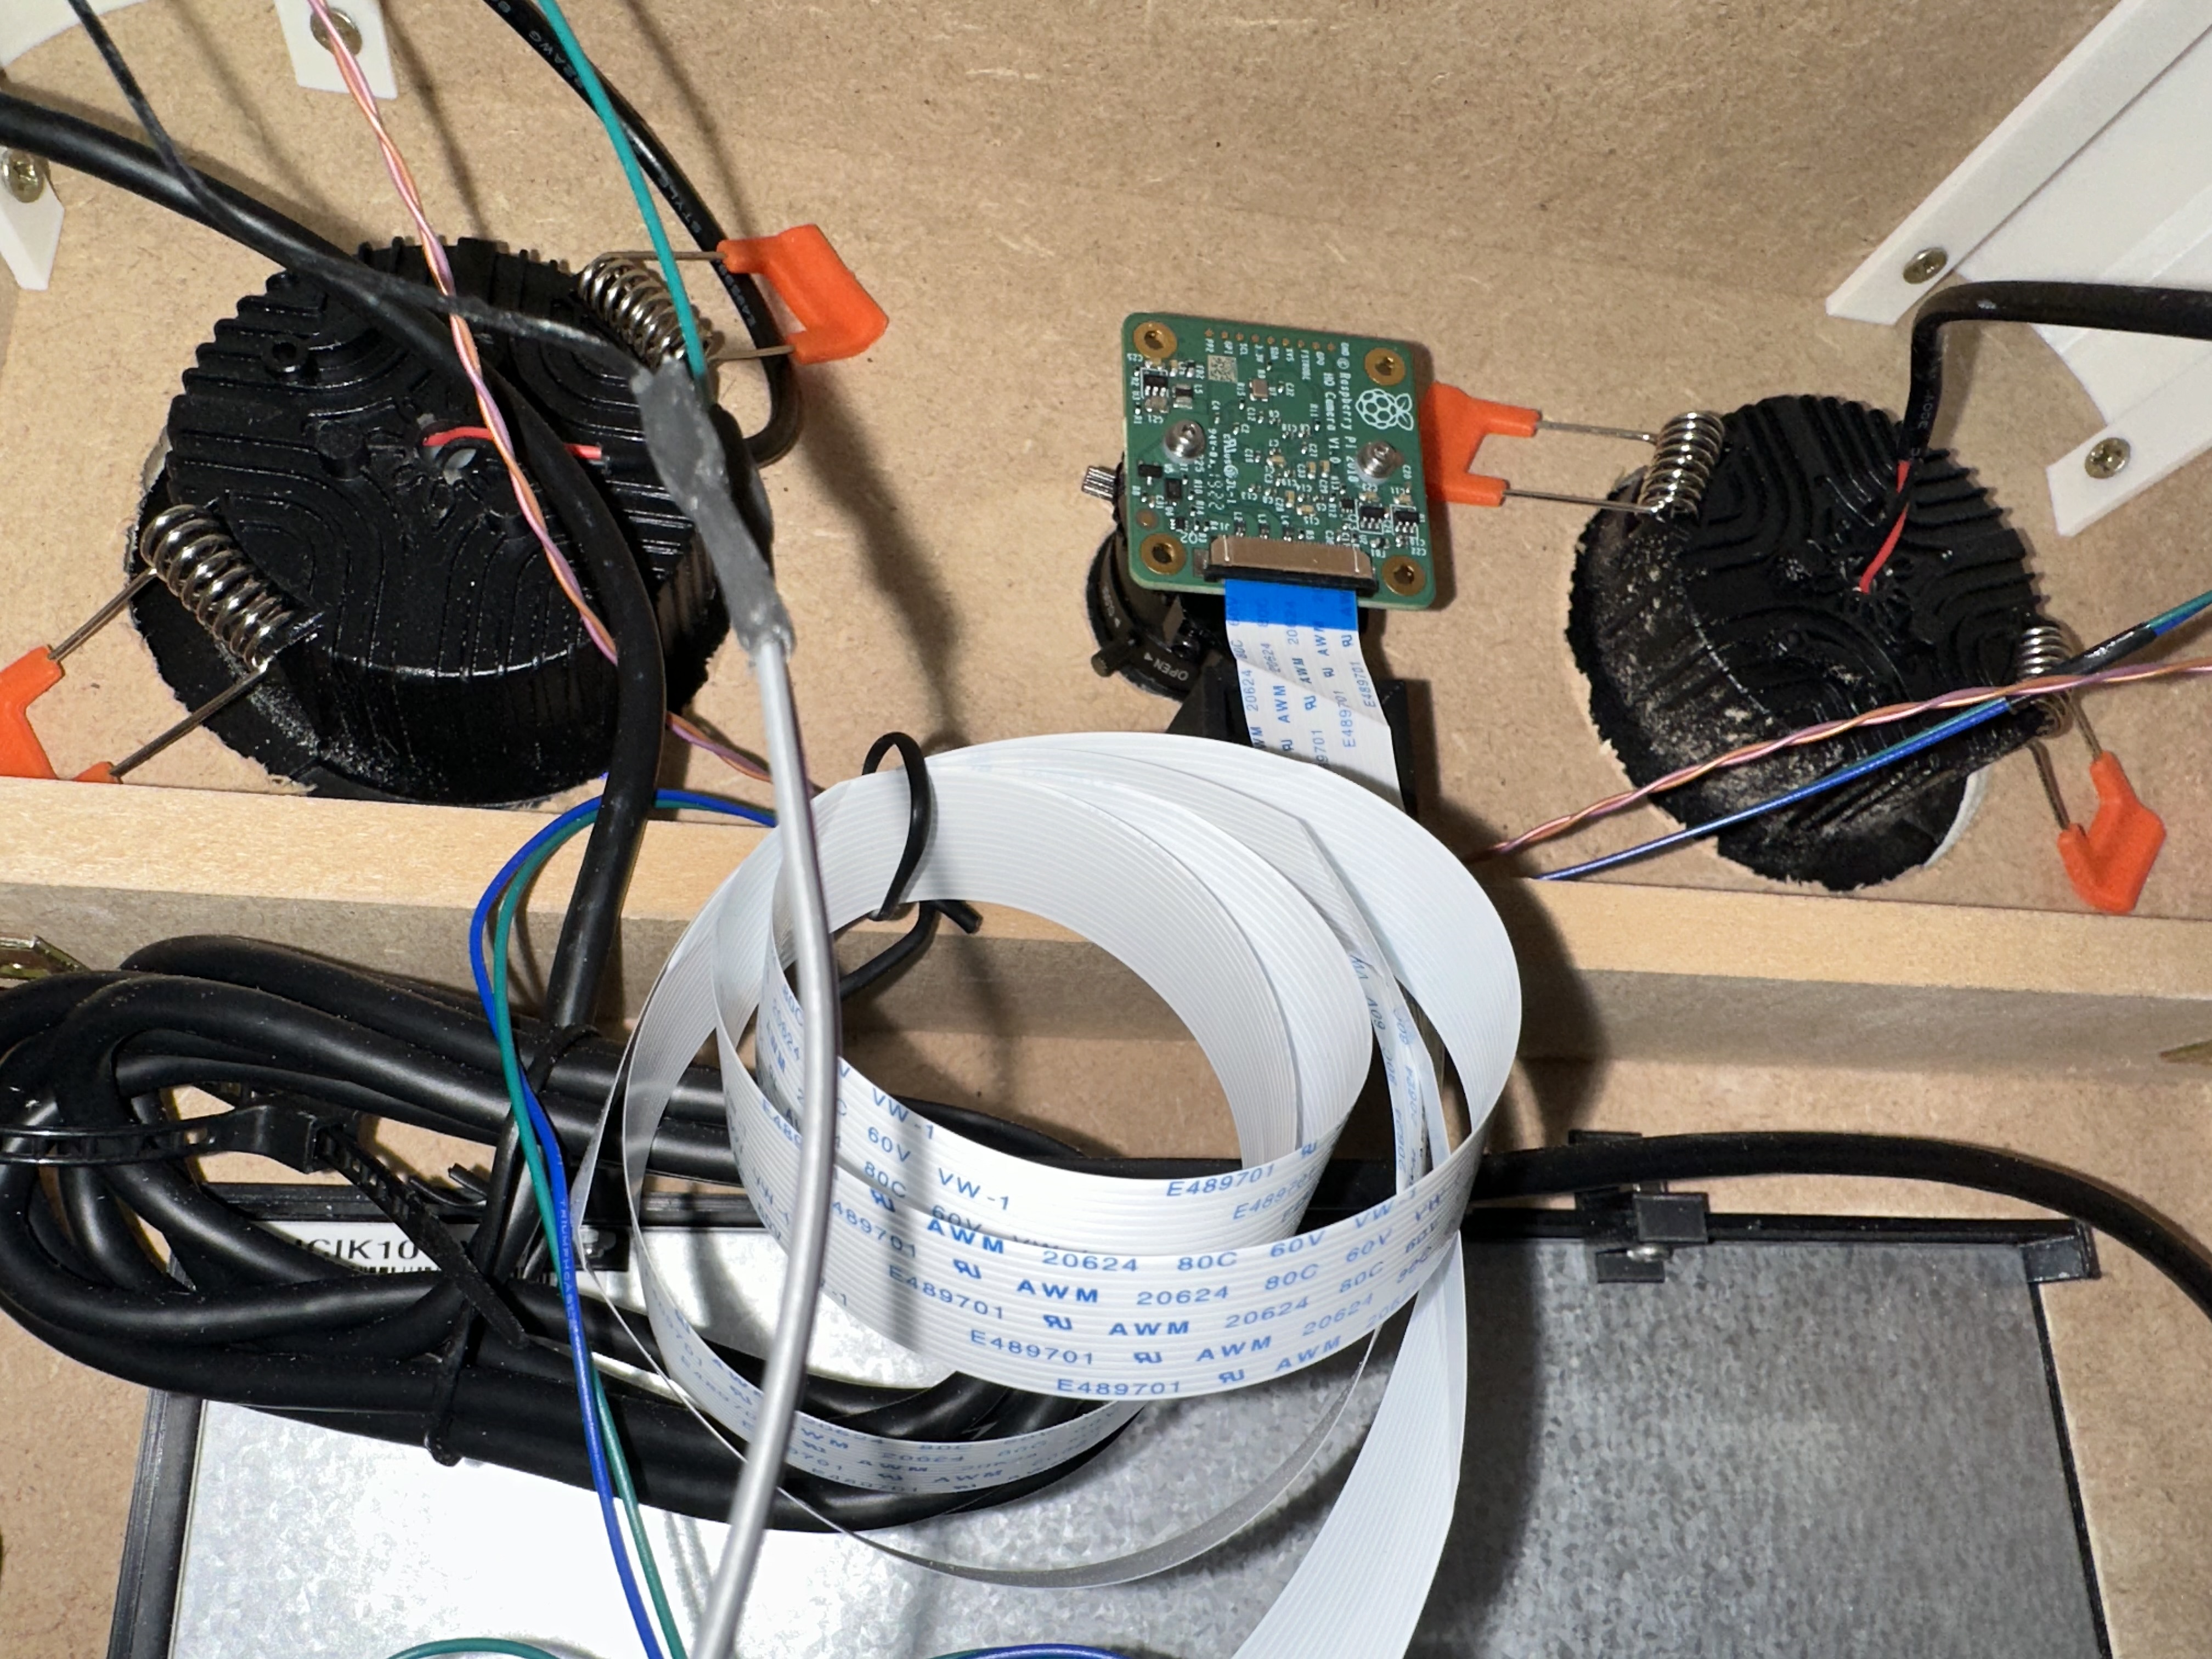
- Raspberry PI Camera Module 12MP: To be used with dedicated lens to take the pictures.
- CS Lens for Camera: Used to take picture with a good quality.
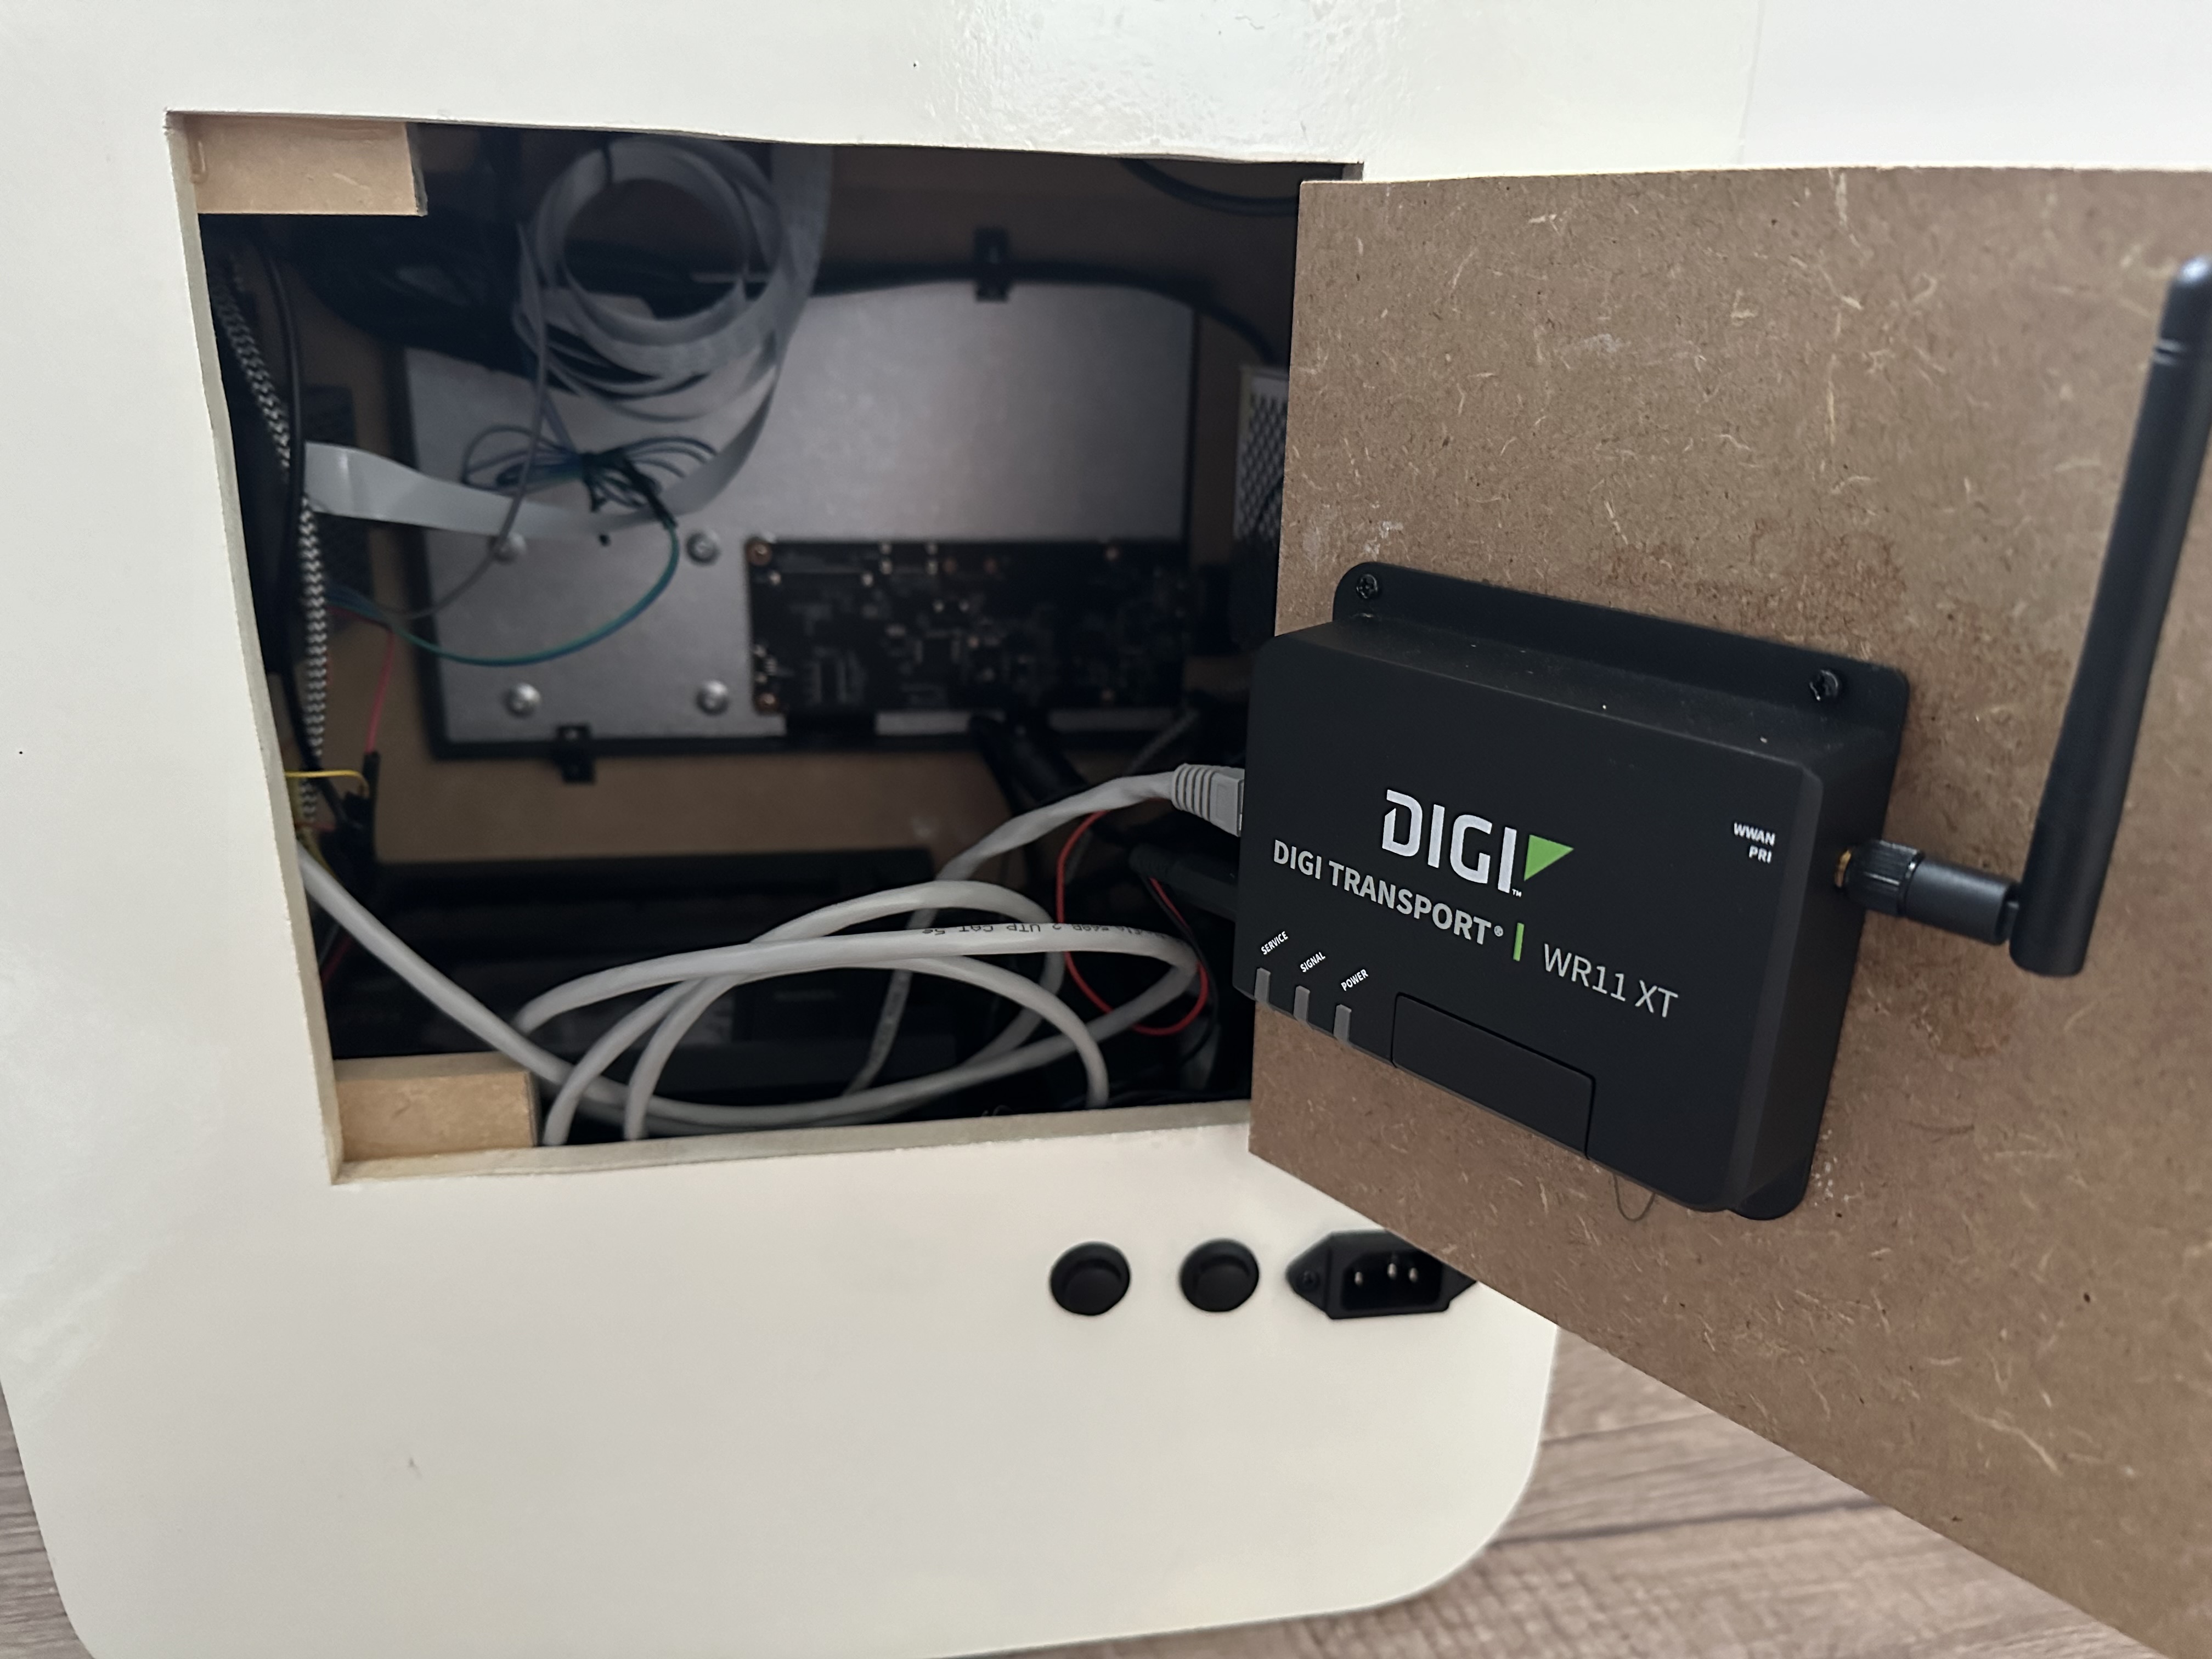
- 3G Router - Digi WR11XT: Used to push all pictures in a cloud storage each time a new one is shot.
- Solid State Drive (SSD) 128Go: To keep photos stored locally in case of network connectivity issue.
- mSATA to USB adapter: The SSD choosen is in mSATA format. This converter is needed to connect to the Raspberry Pi.
- SainSmart 10" touchscreen display: To show the easy & simple interface.
- Canon SELPHY CP1300: To be able to print photos in a 10x15 format.
- 30W (5V-6A) Power Supply: To power all the components.
- Lights: To have a better picture if there is not enough light in the room.
- 2 Push buttons: To be used to turn on/off the photobooth and the lights.
- 2 resistors of 100 Ohm: To be used for push buttons connection.
- USB Speaker: Use only to play a sound when the during the shot.
- USB with External Power Supply: To reduce risk due to power consumption of SSD.
The Hardware
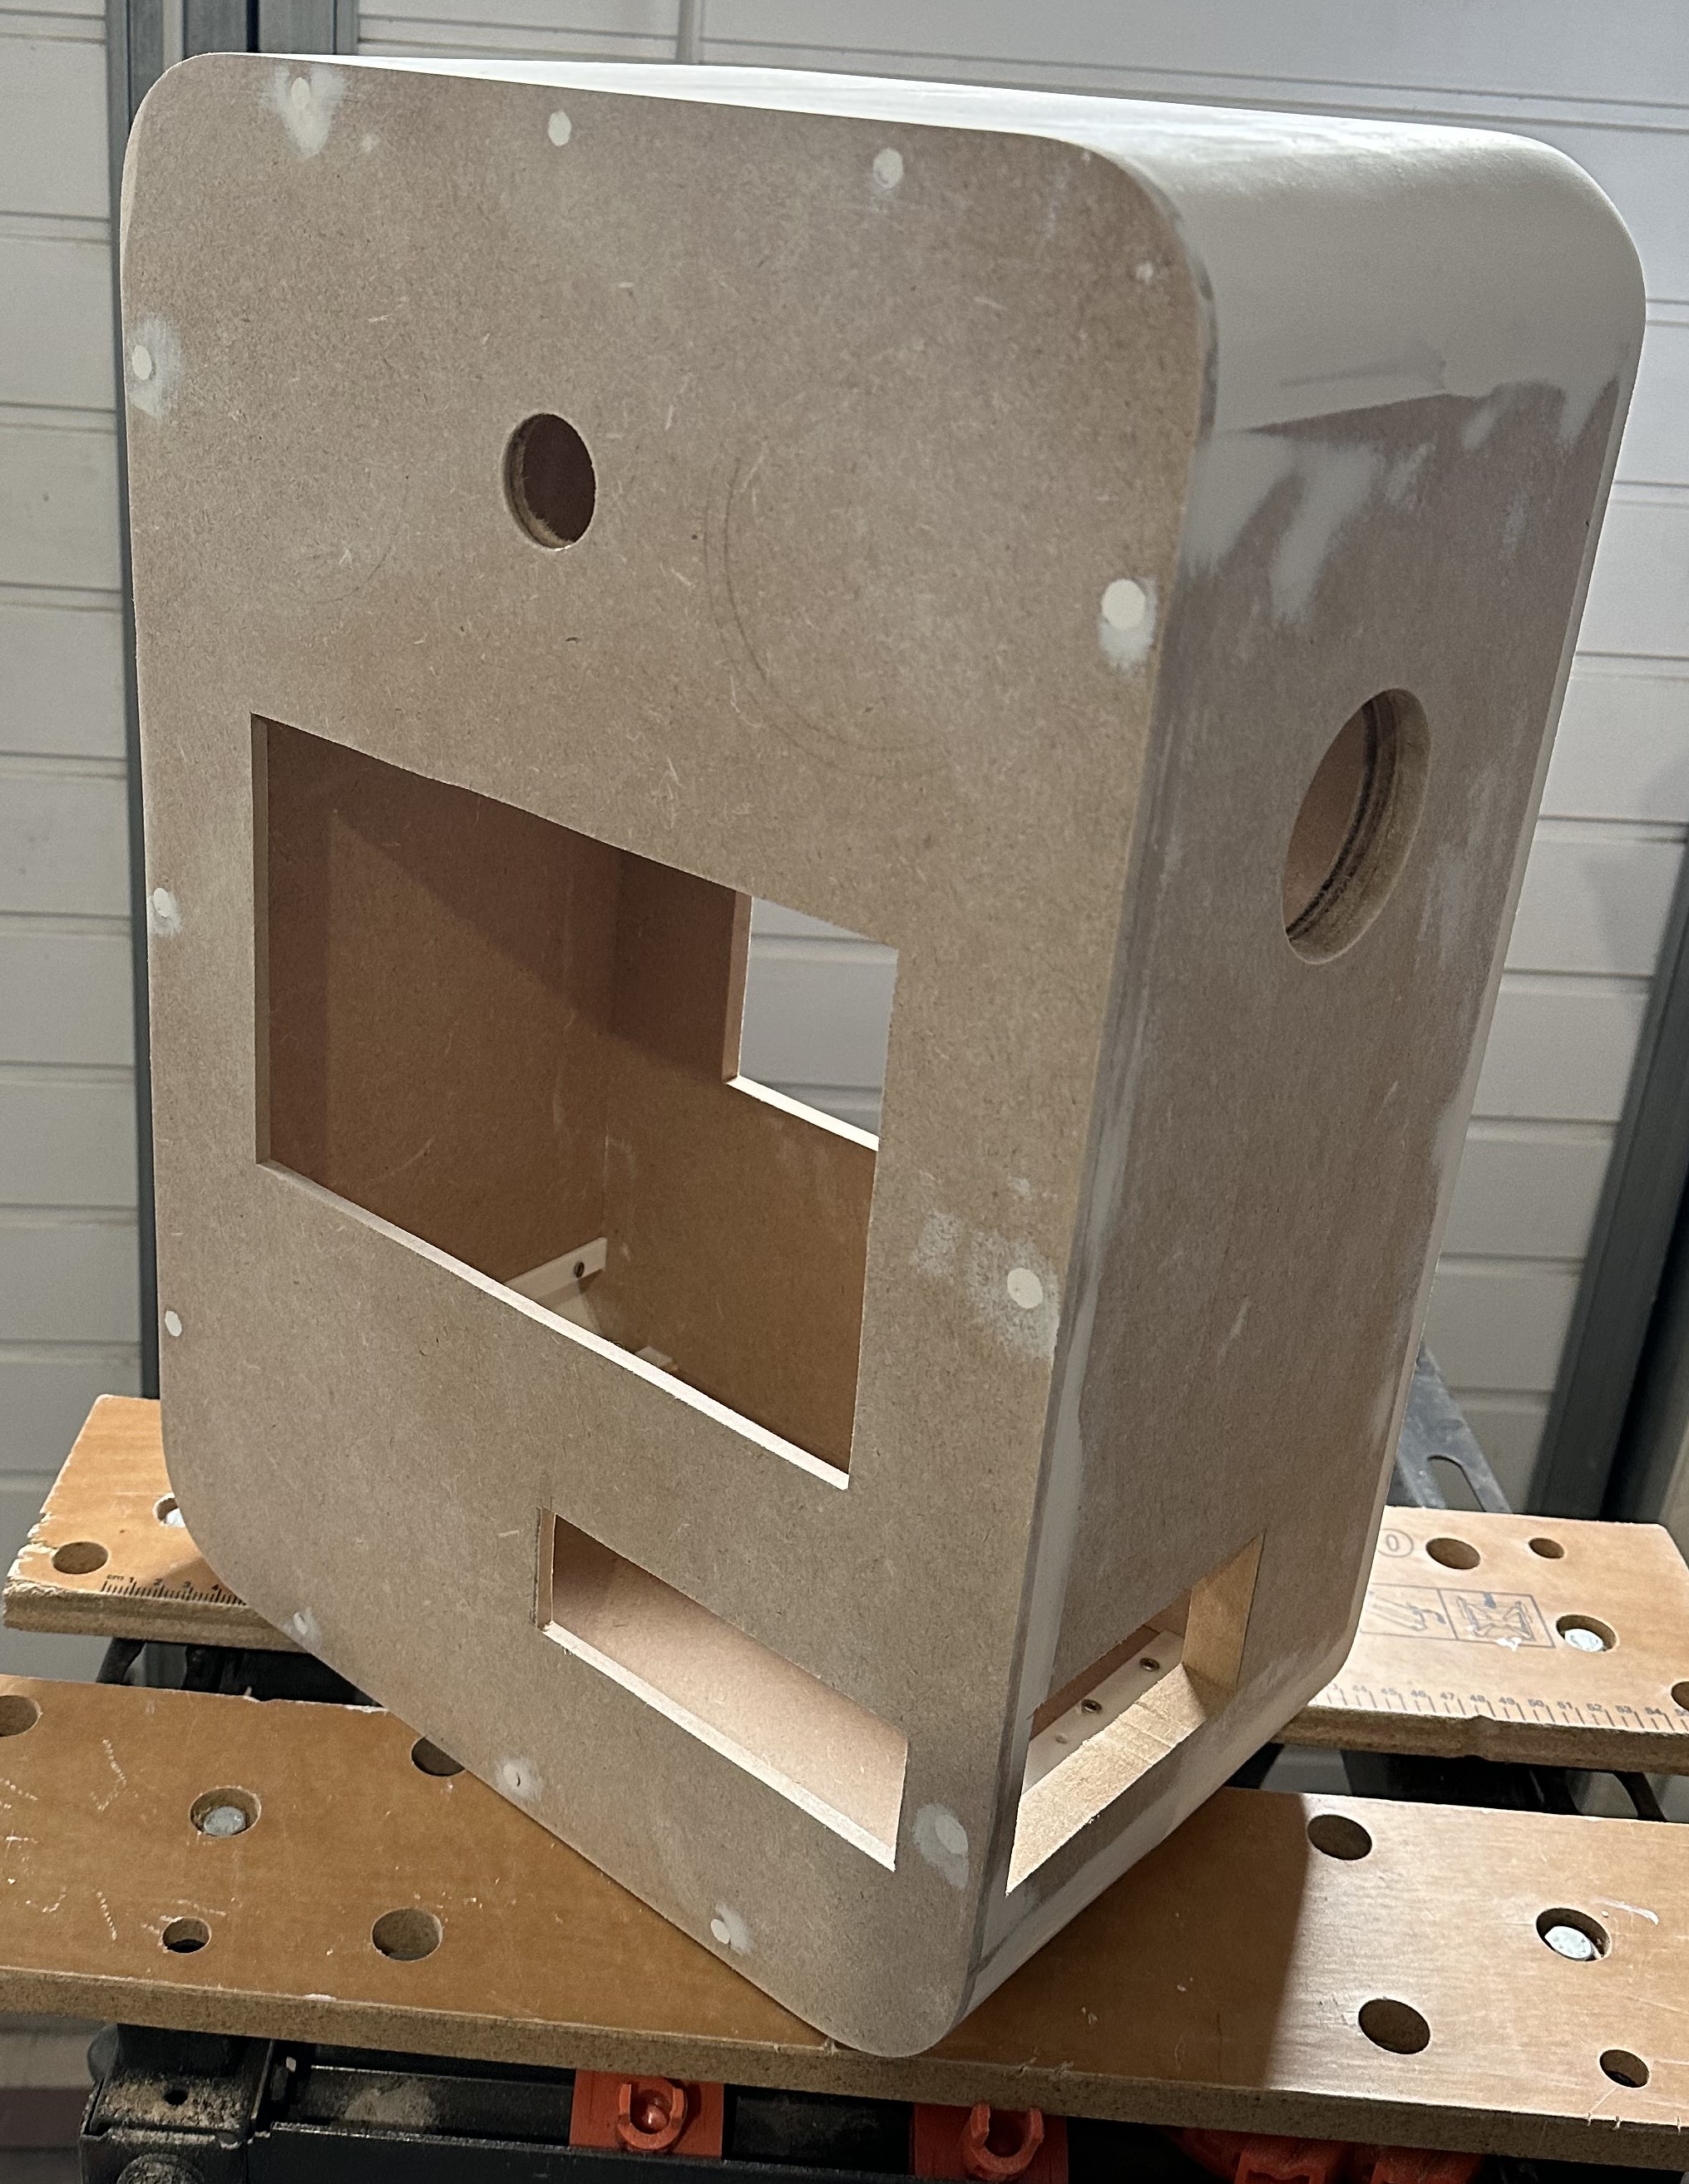
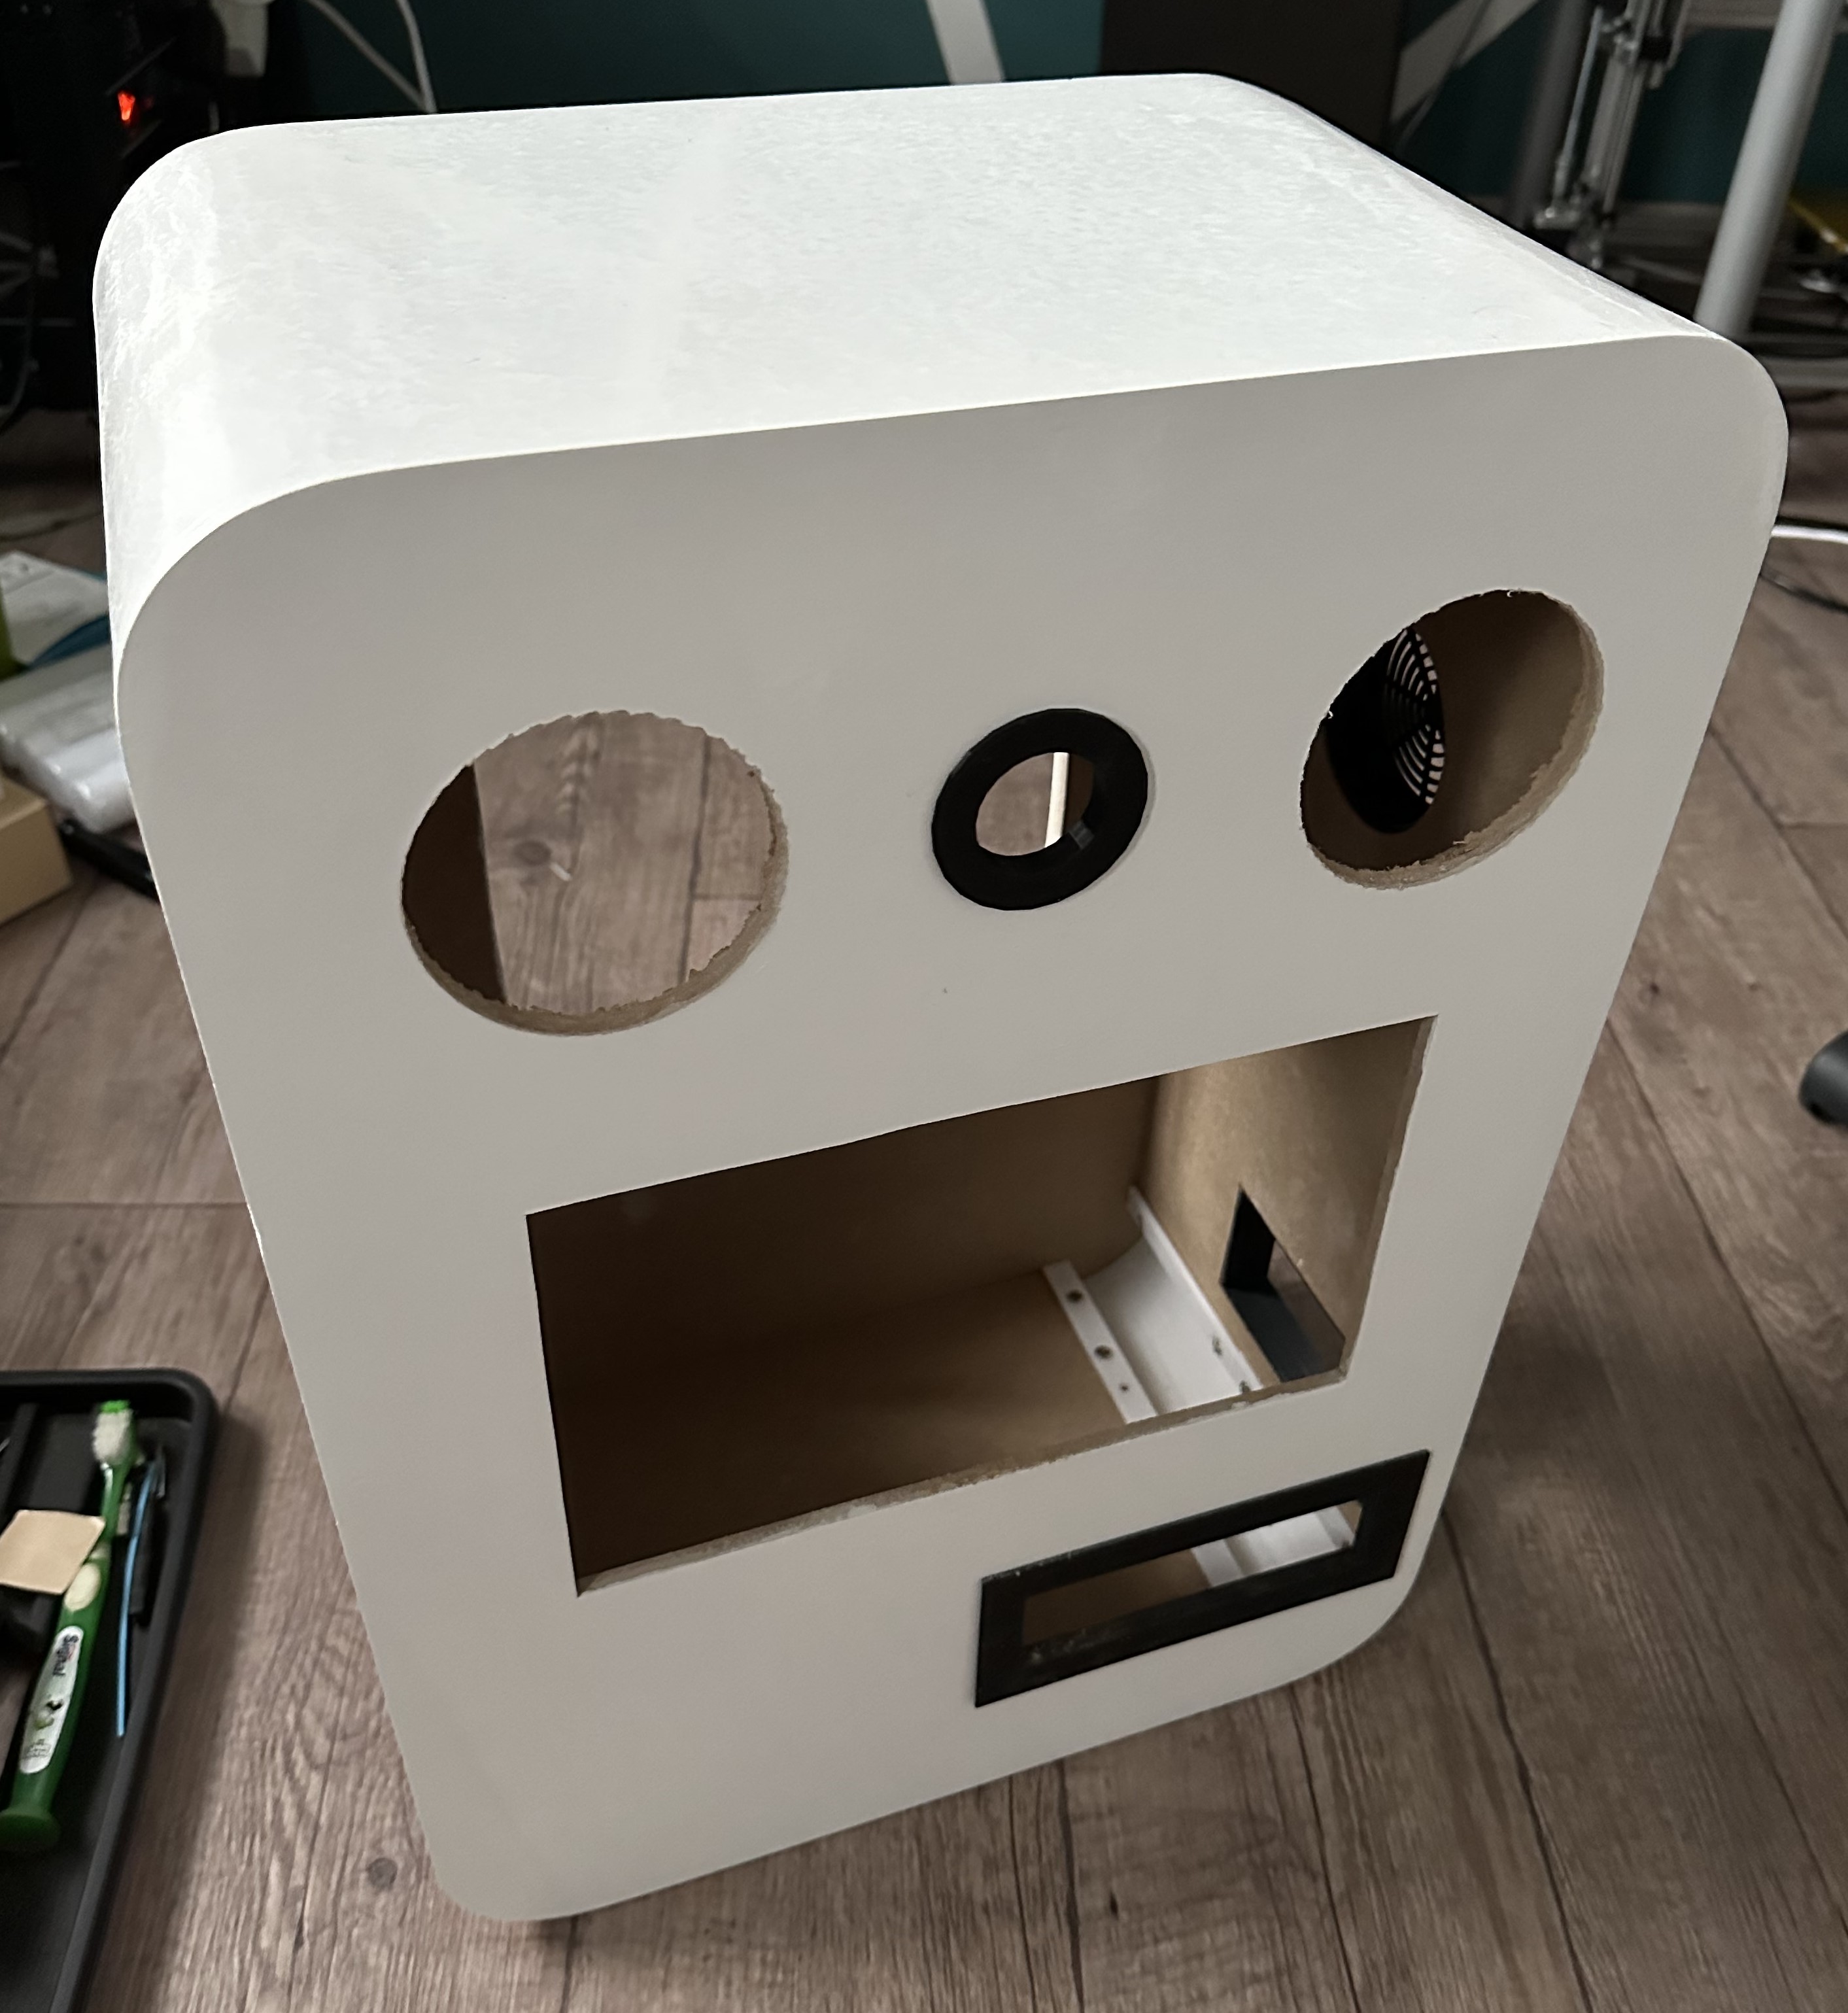
The enclosure
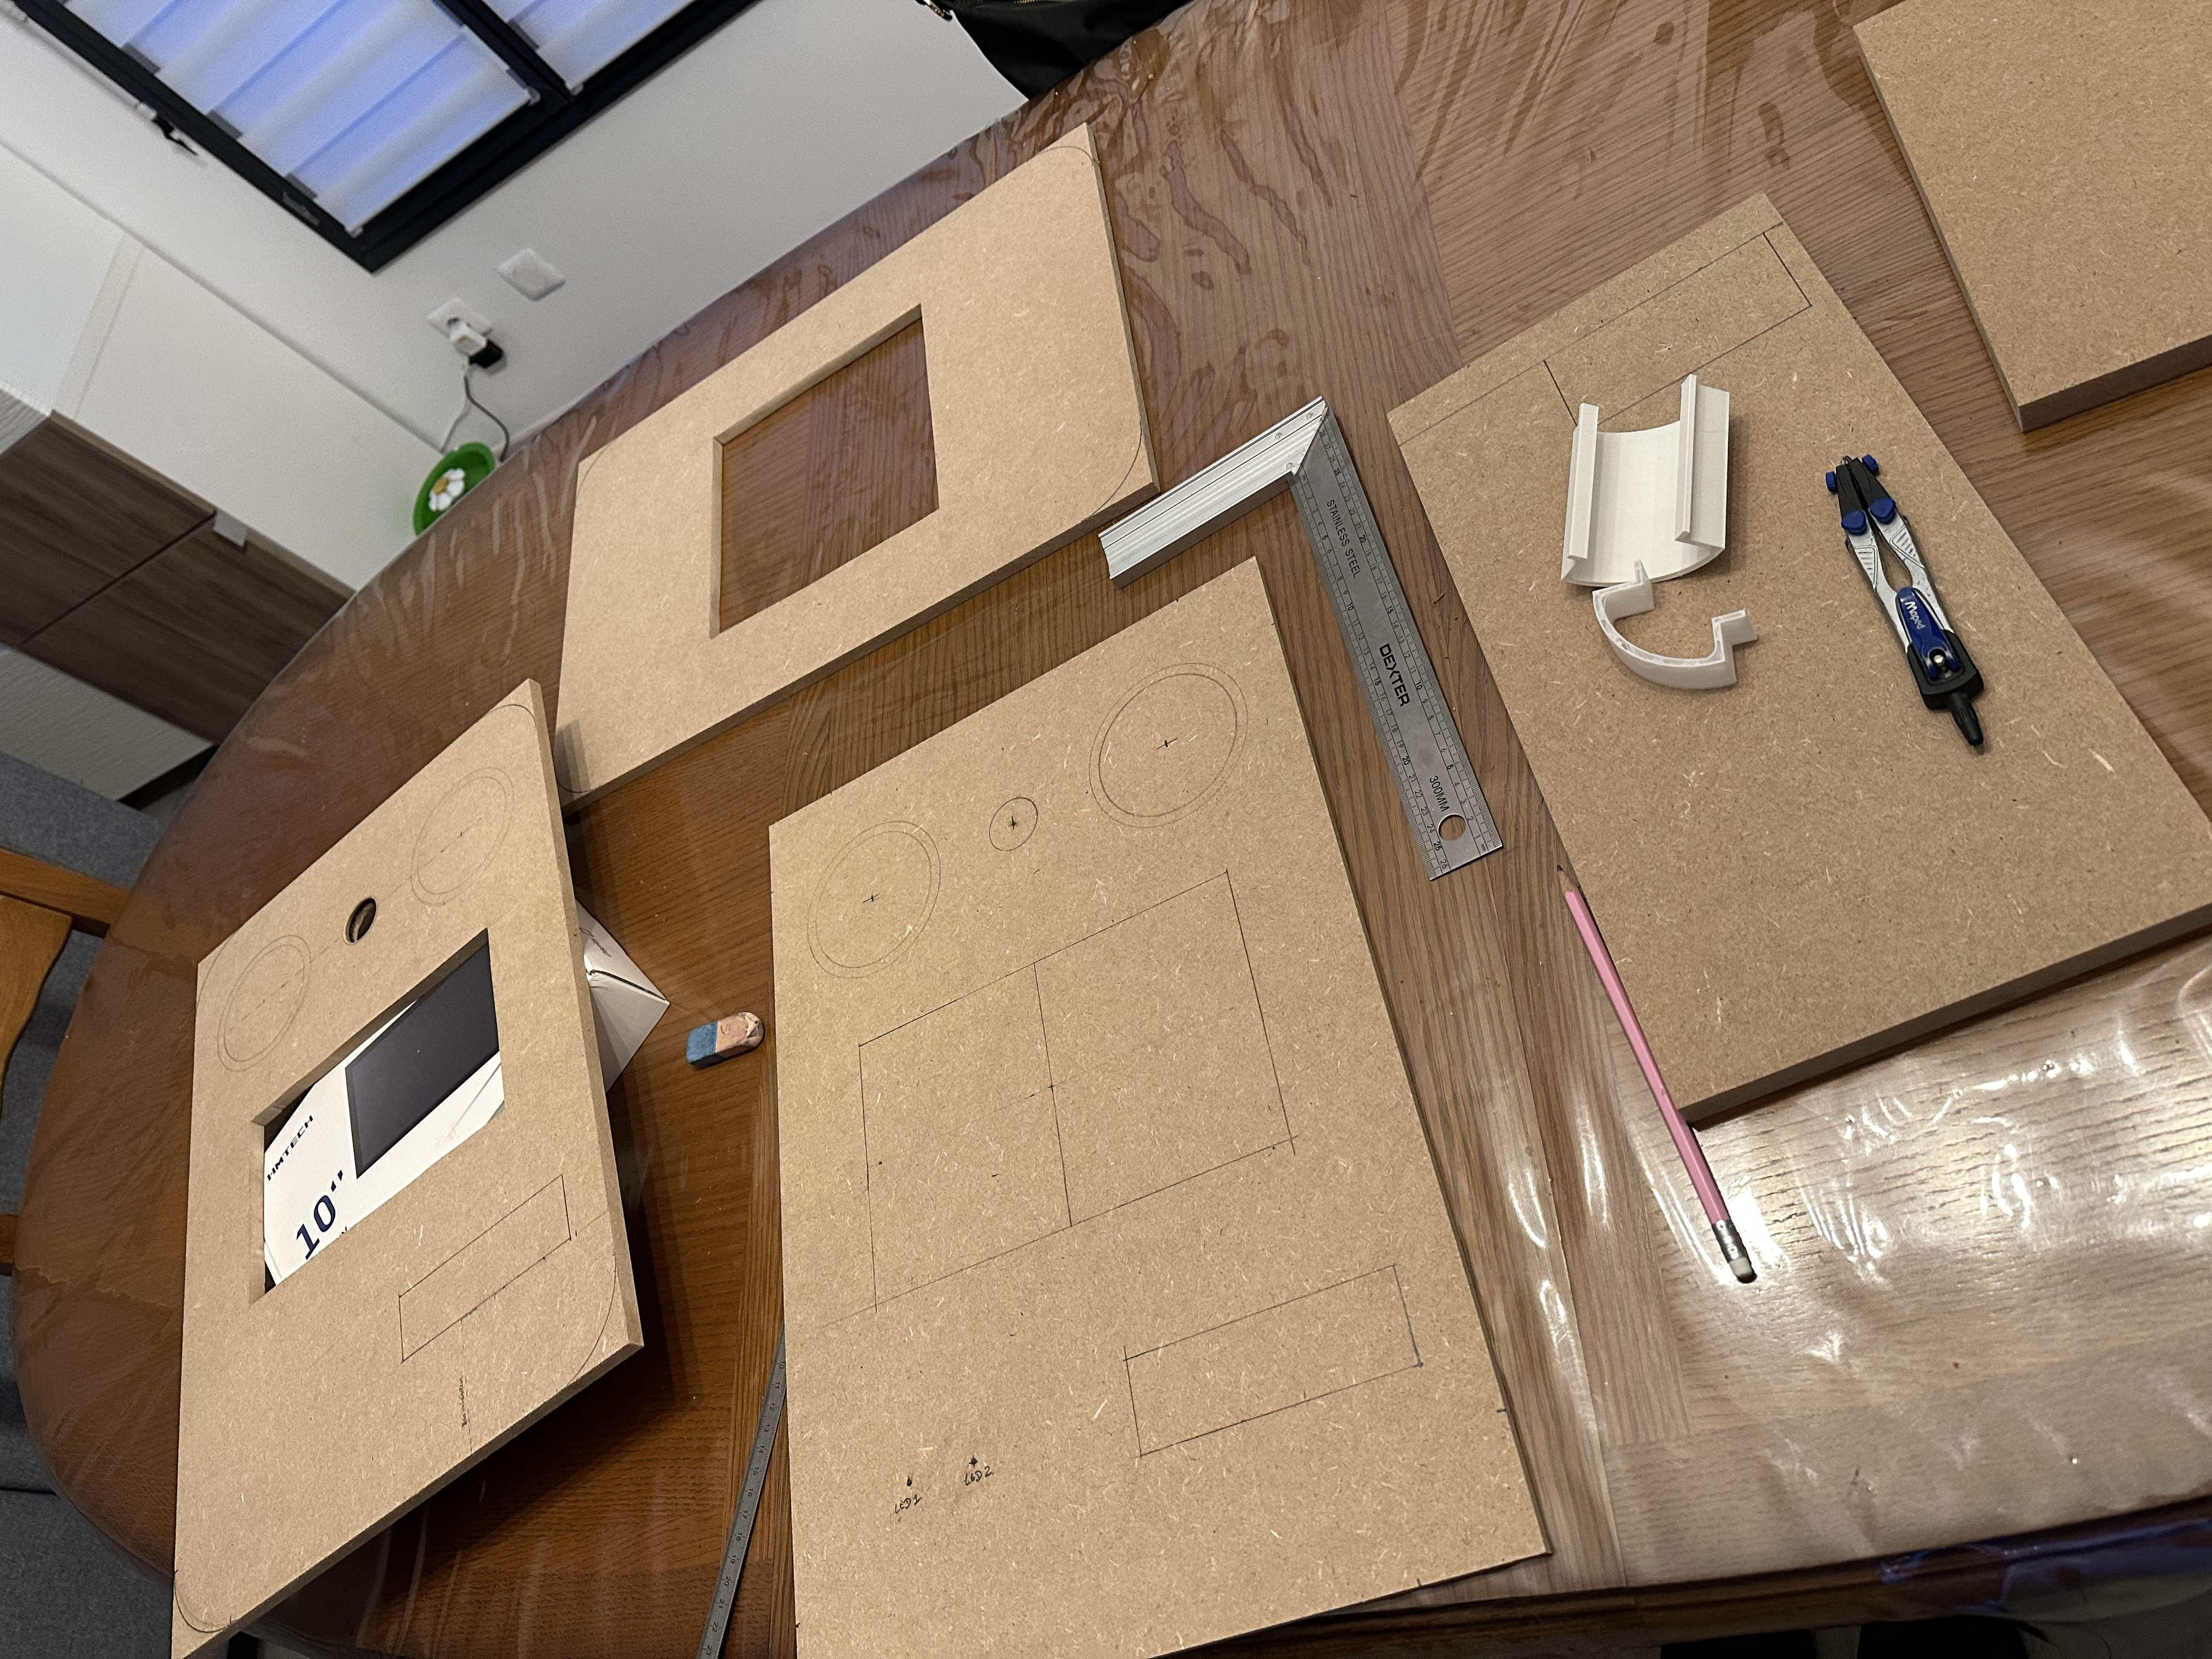
For the enclosure of your DIY photobooth, cleanliness and elegance were paramount as the goal is to use for my wedding.
It has been made using:
- MDF Wood Panels
- Several 3D printed parts:
- Holder for camera
- Frame for camera
- Holder for the printer
- Frames for the printer (front & side)
- Side Aerators
- Corners
- Wood glue
- Wood putty (to fill any imperfections & create a smooth canvas for the finishing touches)
- Glossy white paint
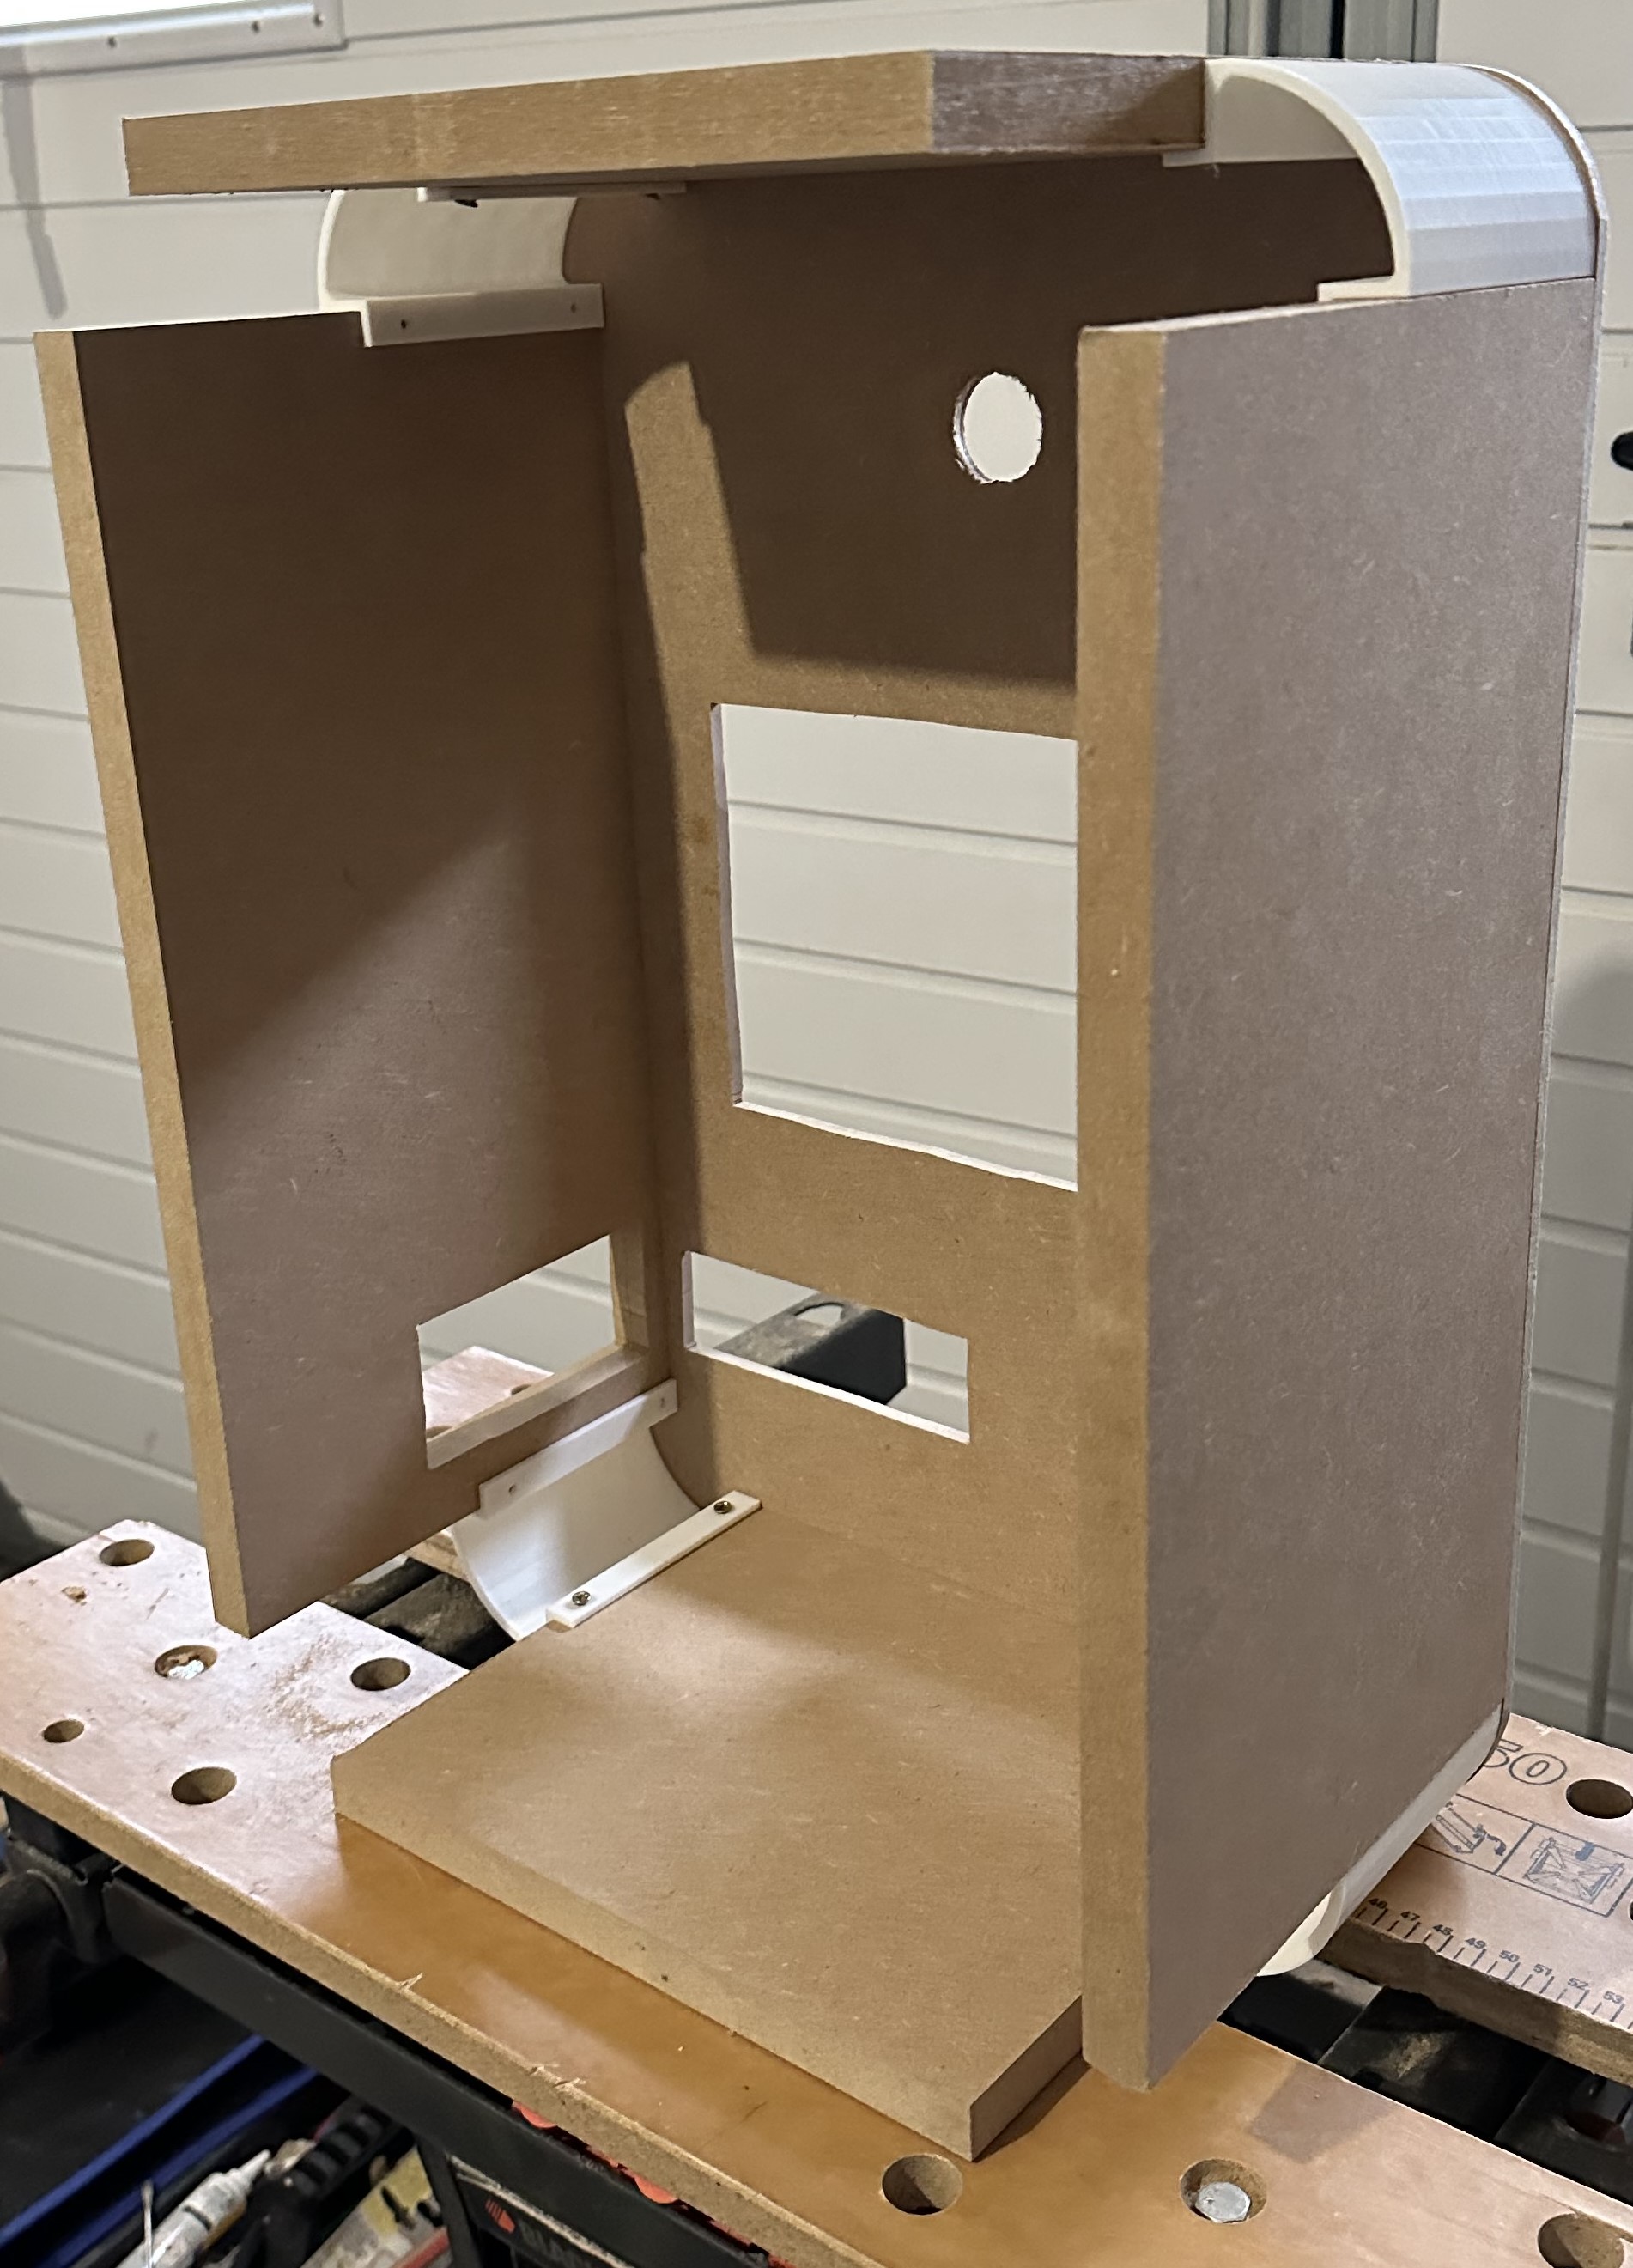
Some pictures of the enclosure building steps:

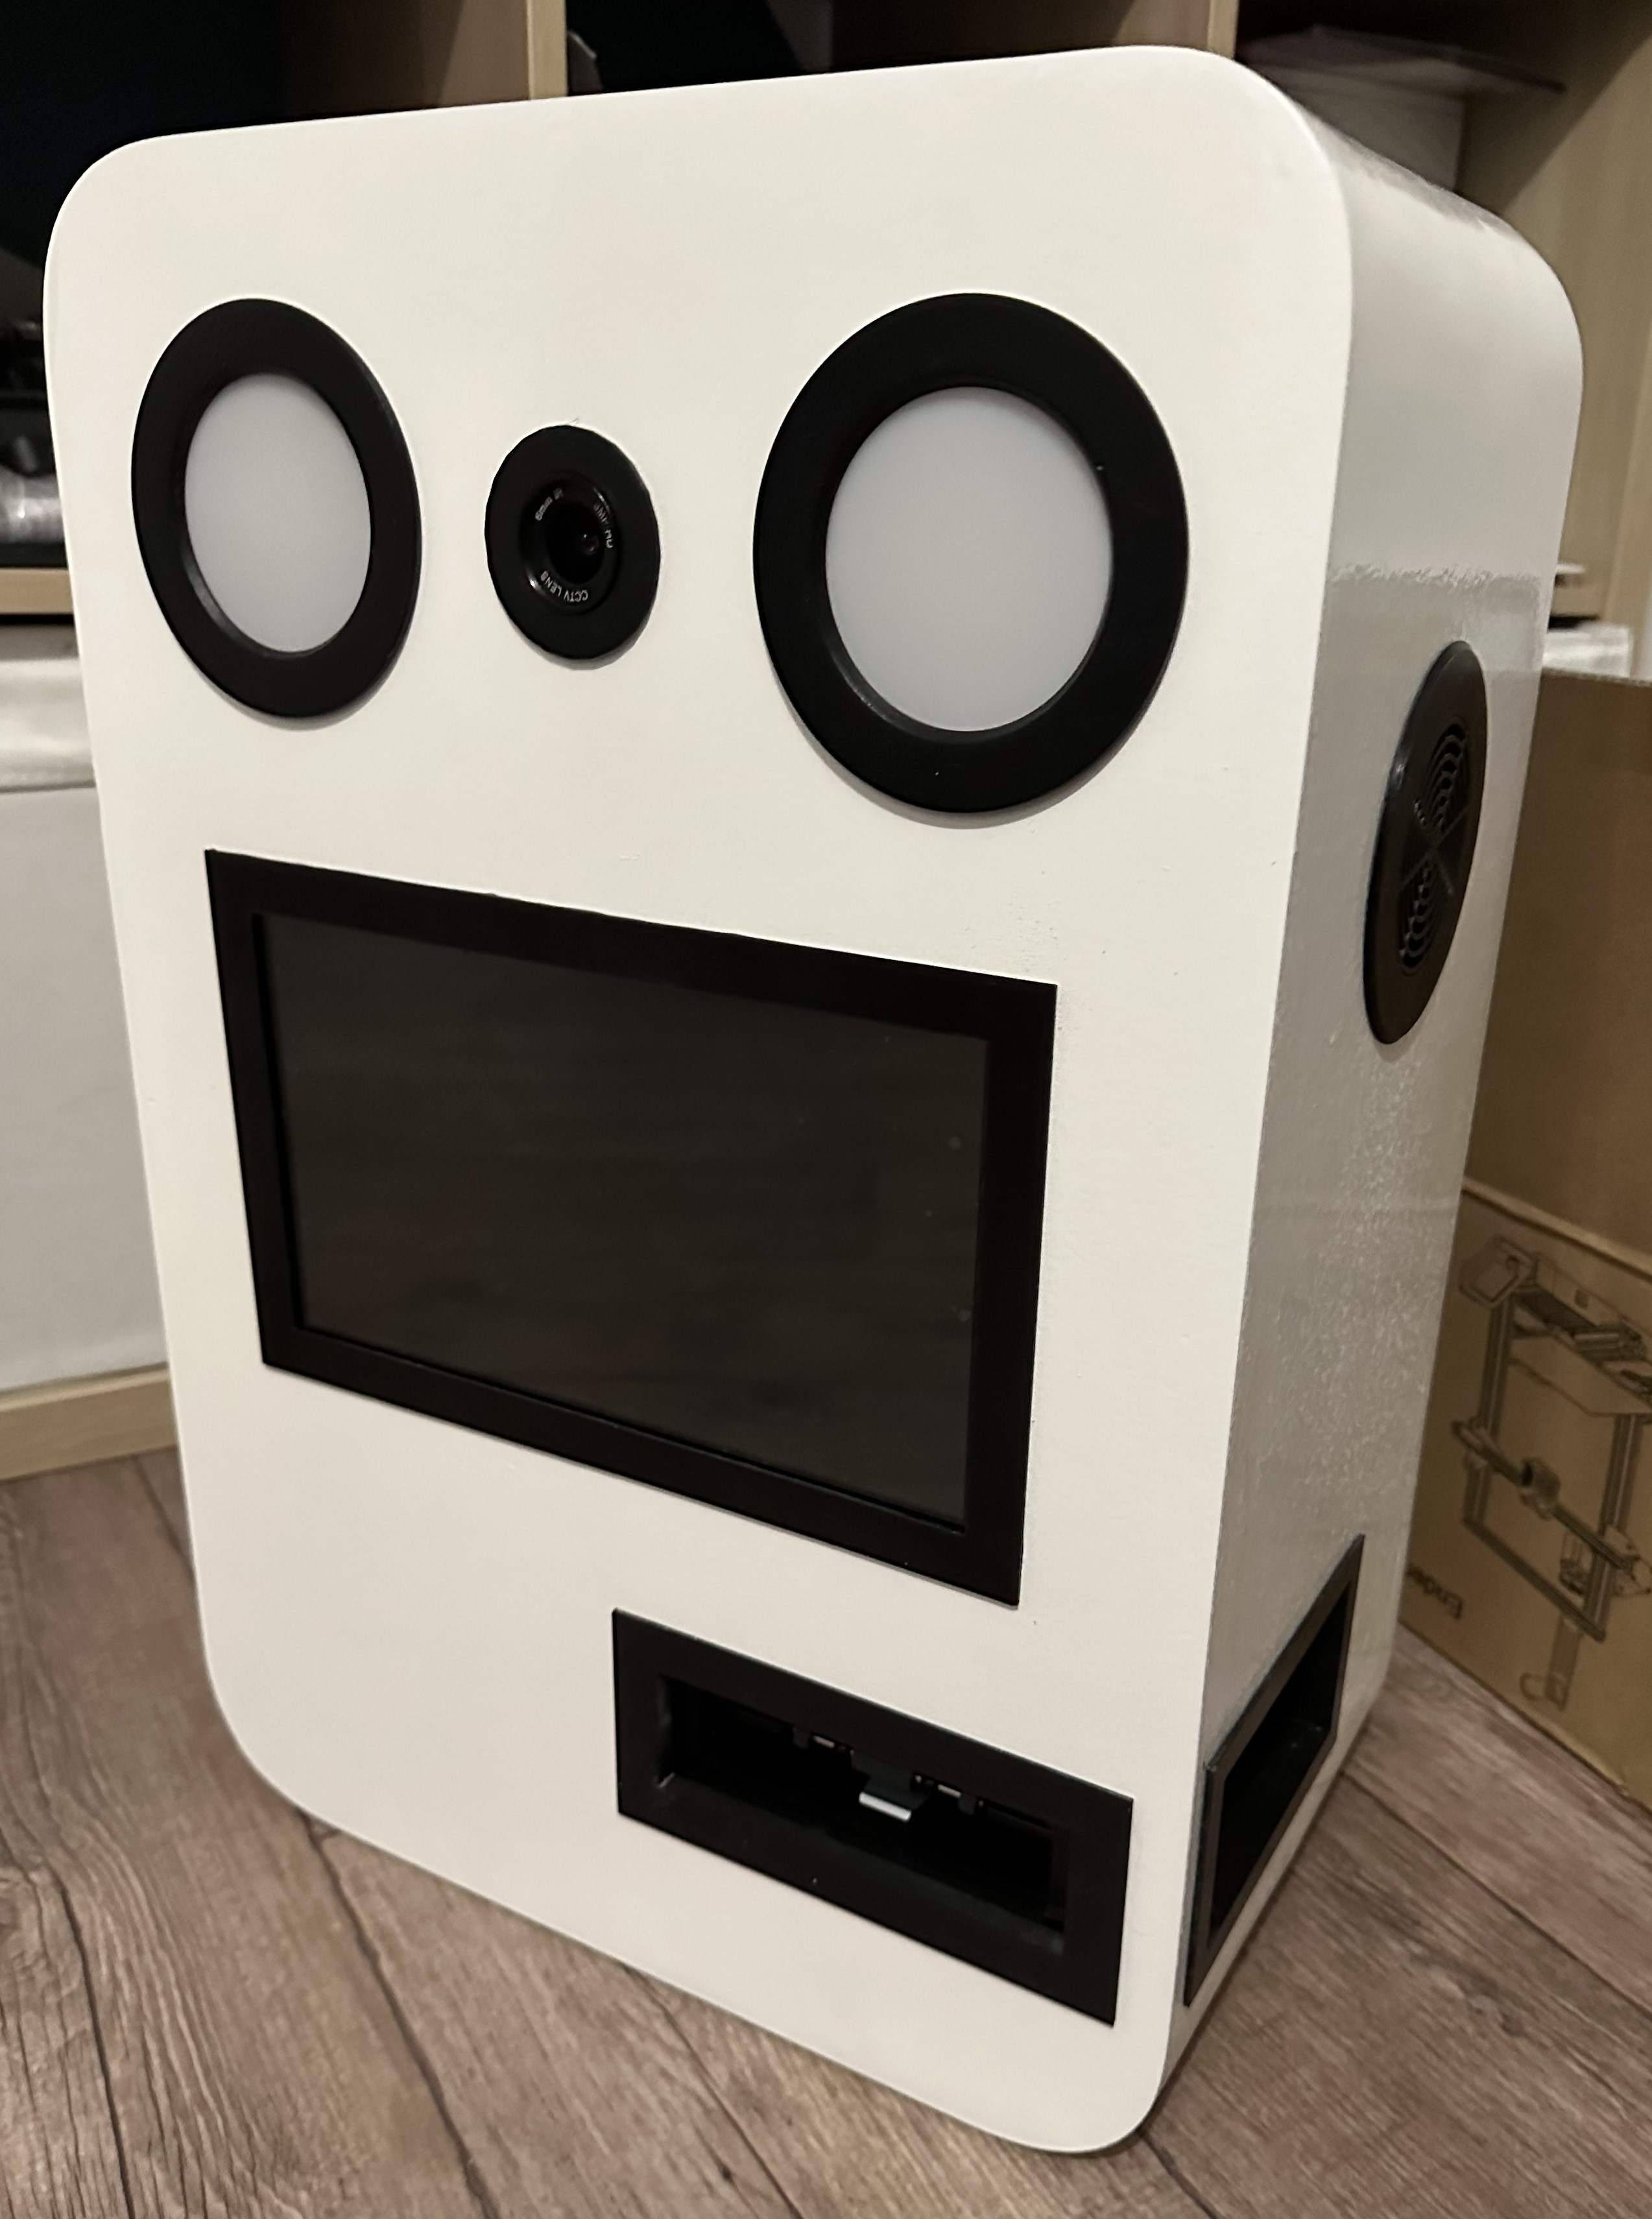
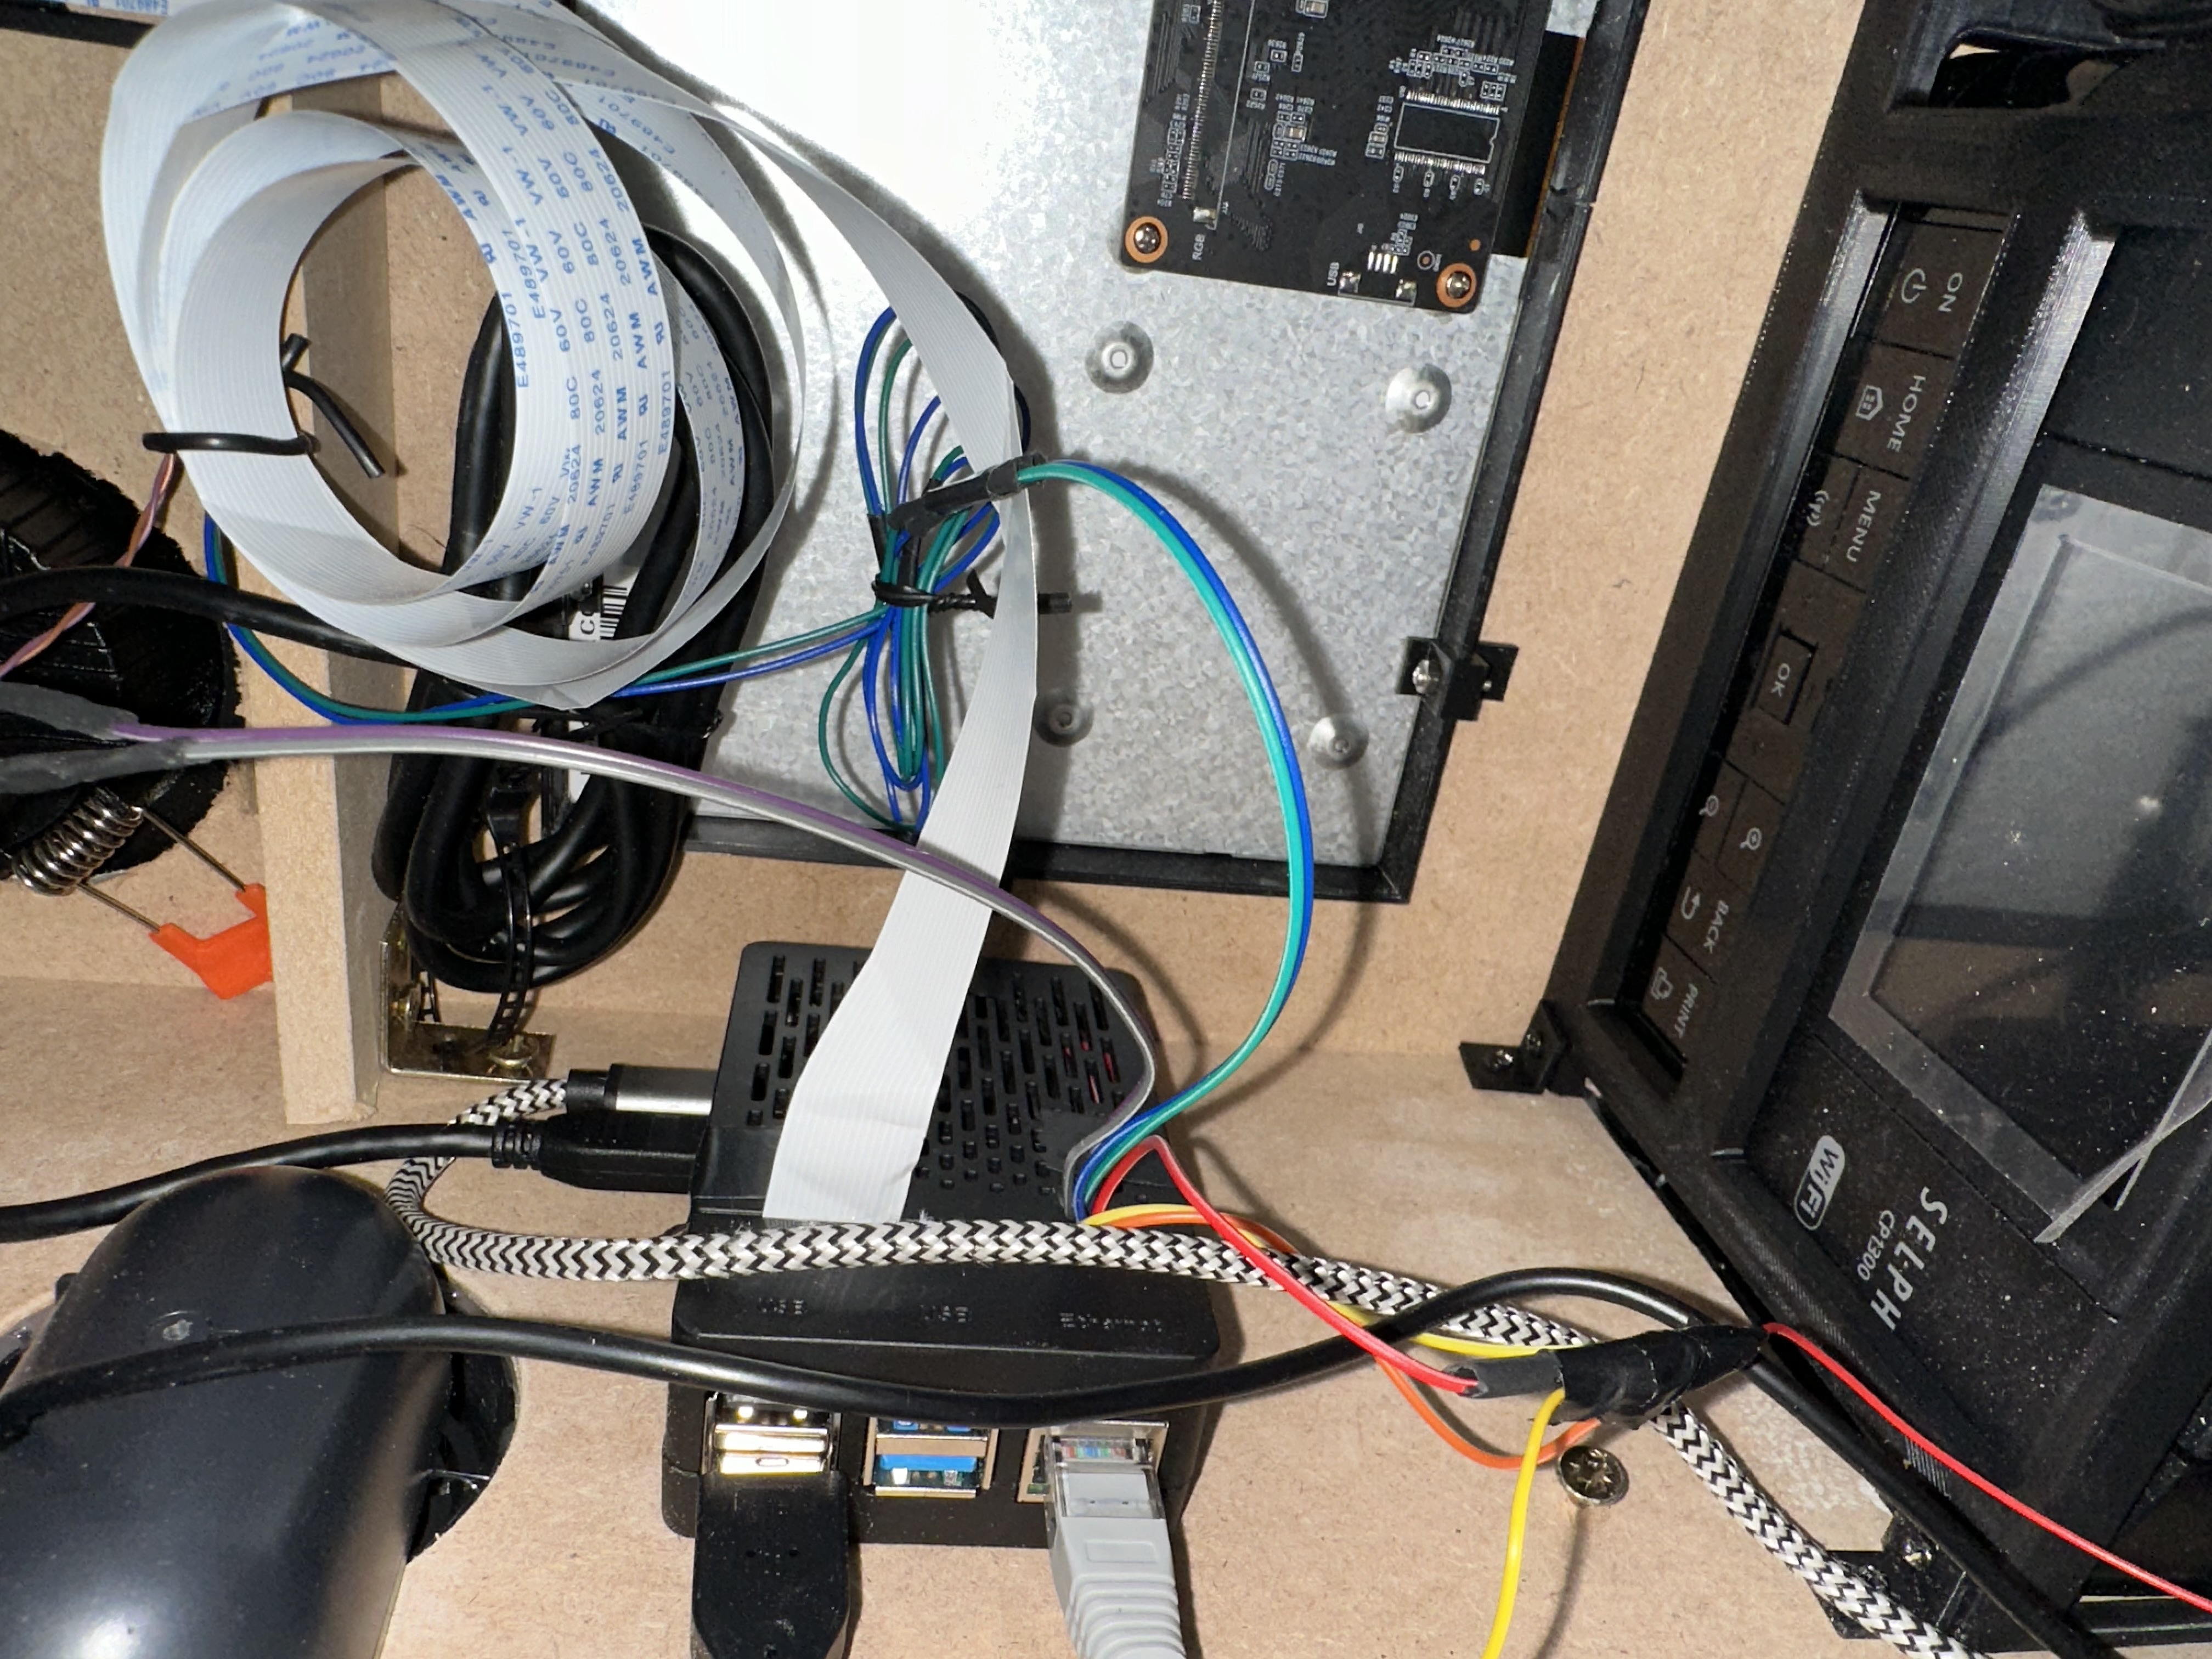
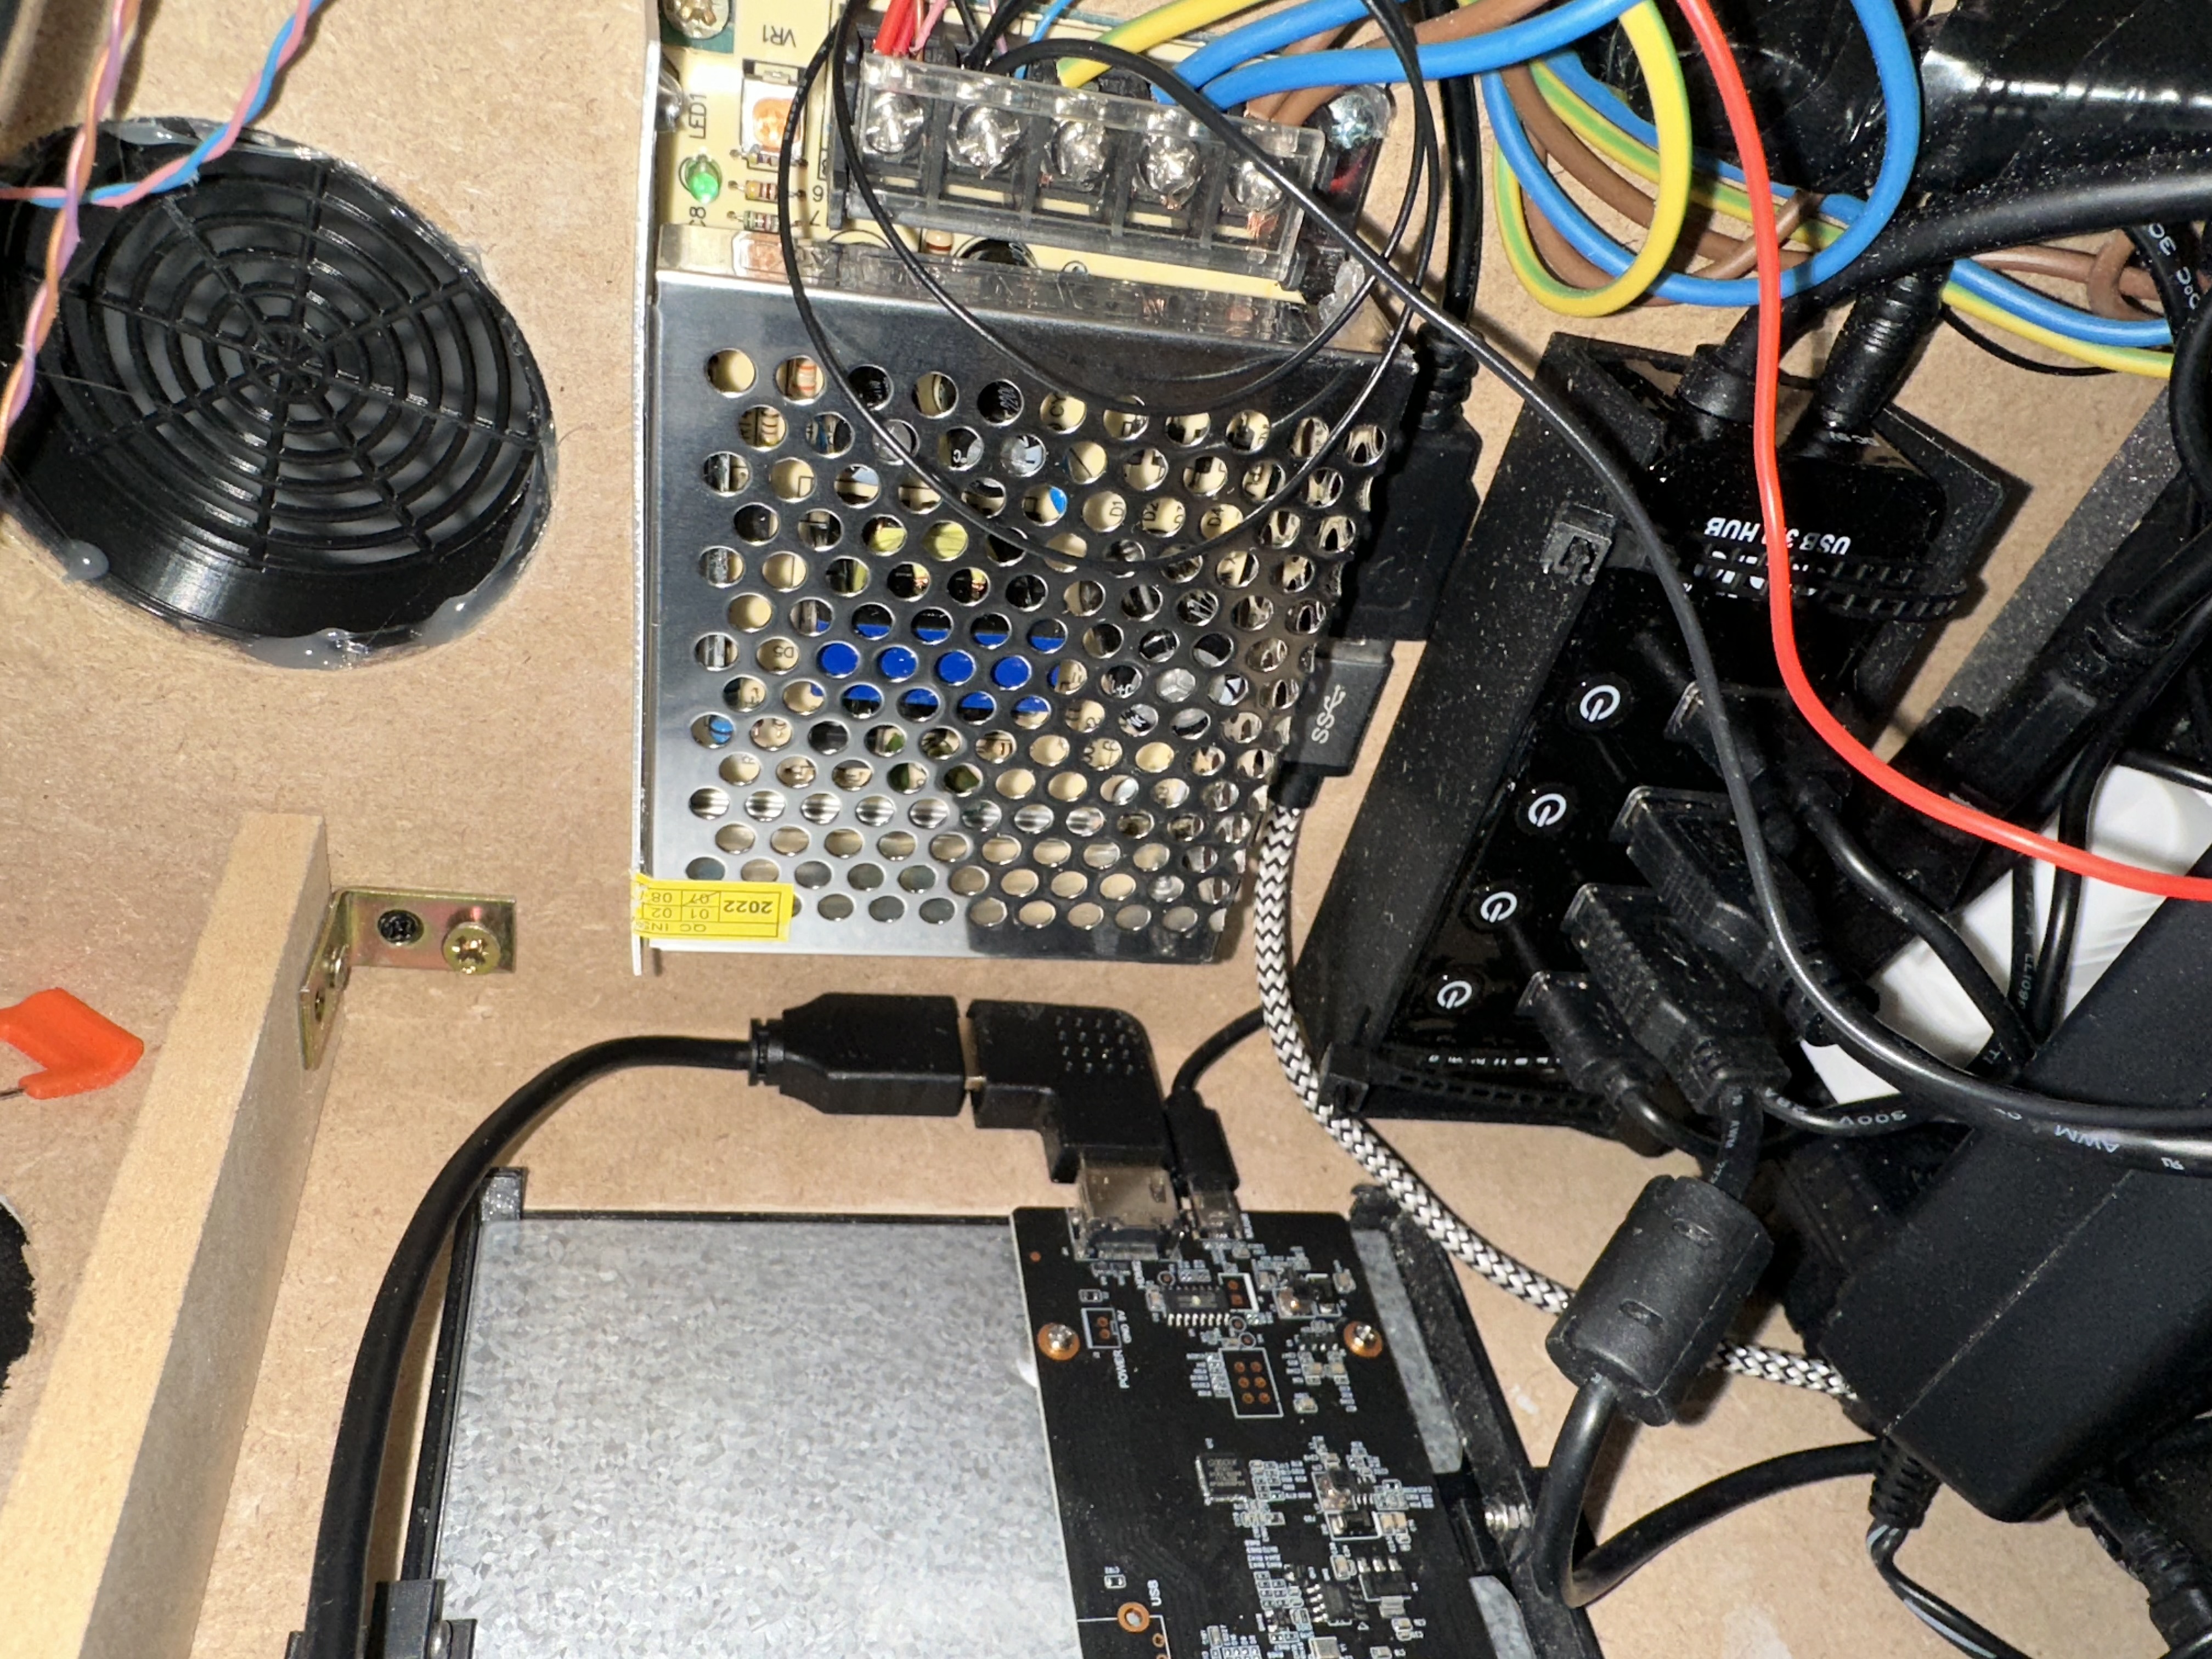
The inside
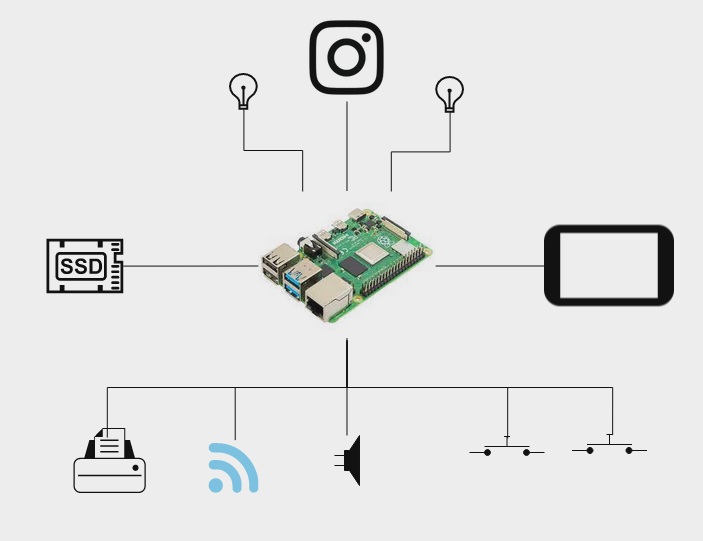
The schema represents the simplified architecture of the photobooth. Every components are connected to the Raspberry Pi, which is the core of the photobooth.
Once everything is connected and mounted on the chassis, it looks like bellow:
The Software
Prepare the Raspberry PI
It’s essential to prepare the Raspberry PI, ensuring optimal performance and storage capabilities. I decided to use an SSD instead of SD card because of the lifetime, which is much higher with an SSD.
This guide can be used to configure the boot on USB SSD Drive.
Note: Official Raspberry PI OS has been installed for better compatiblity of the softwares used
Installing Photobooth Software
The next was to install the required software shown to users. For this, the pibooth project is the perfect match.
Pibooth offers several compelling advantages that make it an excellent choice for DIY photobooth:
- Affordability: The Raspberry Pi is an affordable and versatile computing platform, making the pibooth project a cost-effective solution compared to renting or purchasing a commercial photobooth.
- Customizability: pibooth is a fully open-source & customizable project project.
- Ease of Setup: The pibooth project provides comprehensive documentation and software packages, simplifying the setup process.
- Flexibility: pibooth supports a wide range of peripherals, including cameras, printers, and touchscreen displays, allowing to build a photobooth. Additionally, the project offers various configuration options to adjust settings such as photo resolution, printing layout, and display themes.
- Community Support: The pibooth project benefits from a community of users and developers who contribute to its ongoing development and support.
The installation guide is available on the official website.
I wanted to be able to push pictures in a cloud repository. When peoples will use the photobooth, they will be able to scan a QR code and download the pictures, in addition to the printed version. For this, the plugin [pibooth-google-photo](https://pypi.org/project/pibooth-google-photo/1.0.2/) is used.
Finally, as the target is for the wedding, we have customized the picture frame thanks to the plugin [pibooth-picture-template](https://github.com/pibooth/pibooth-picture-template)
Testing
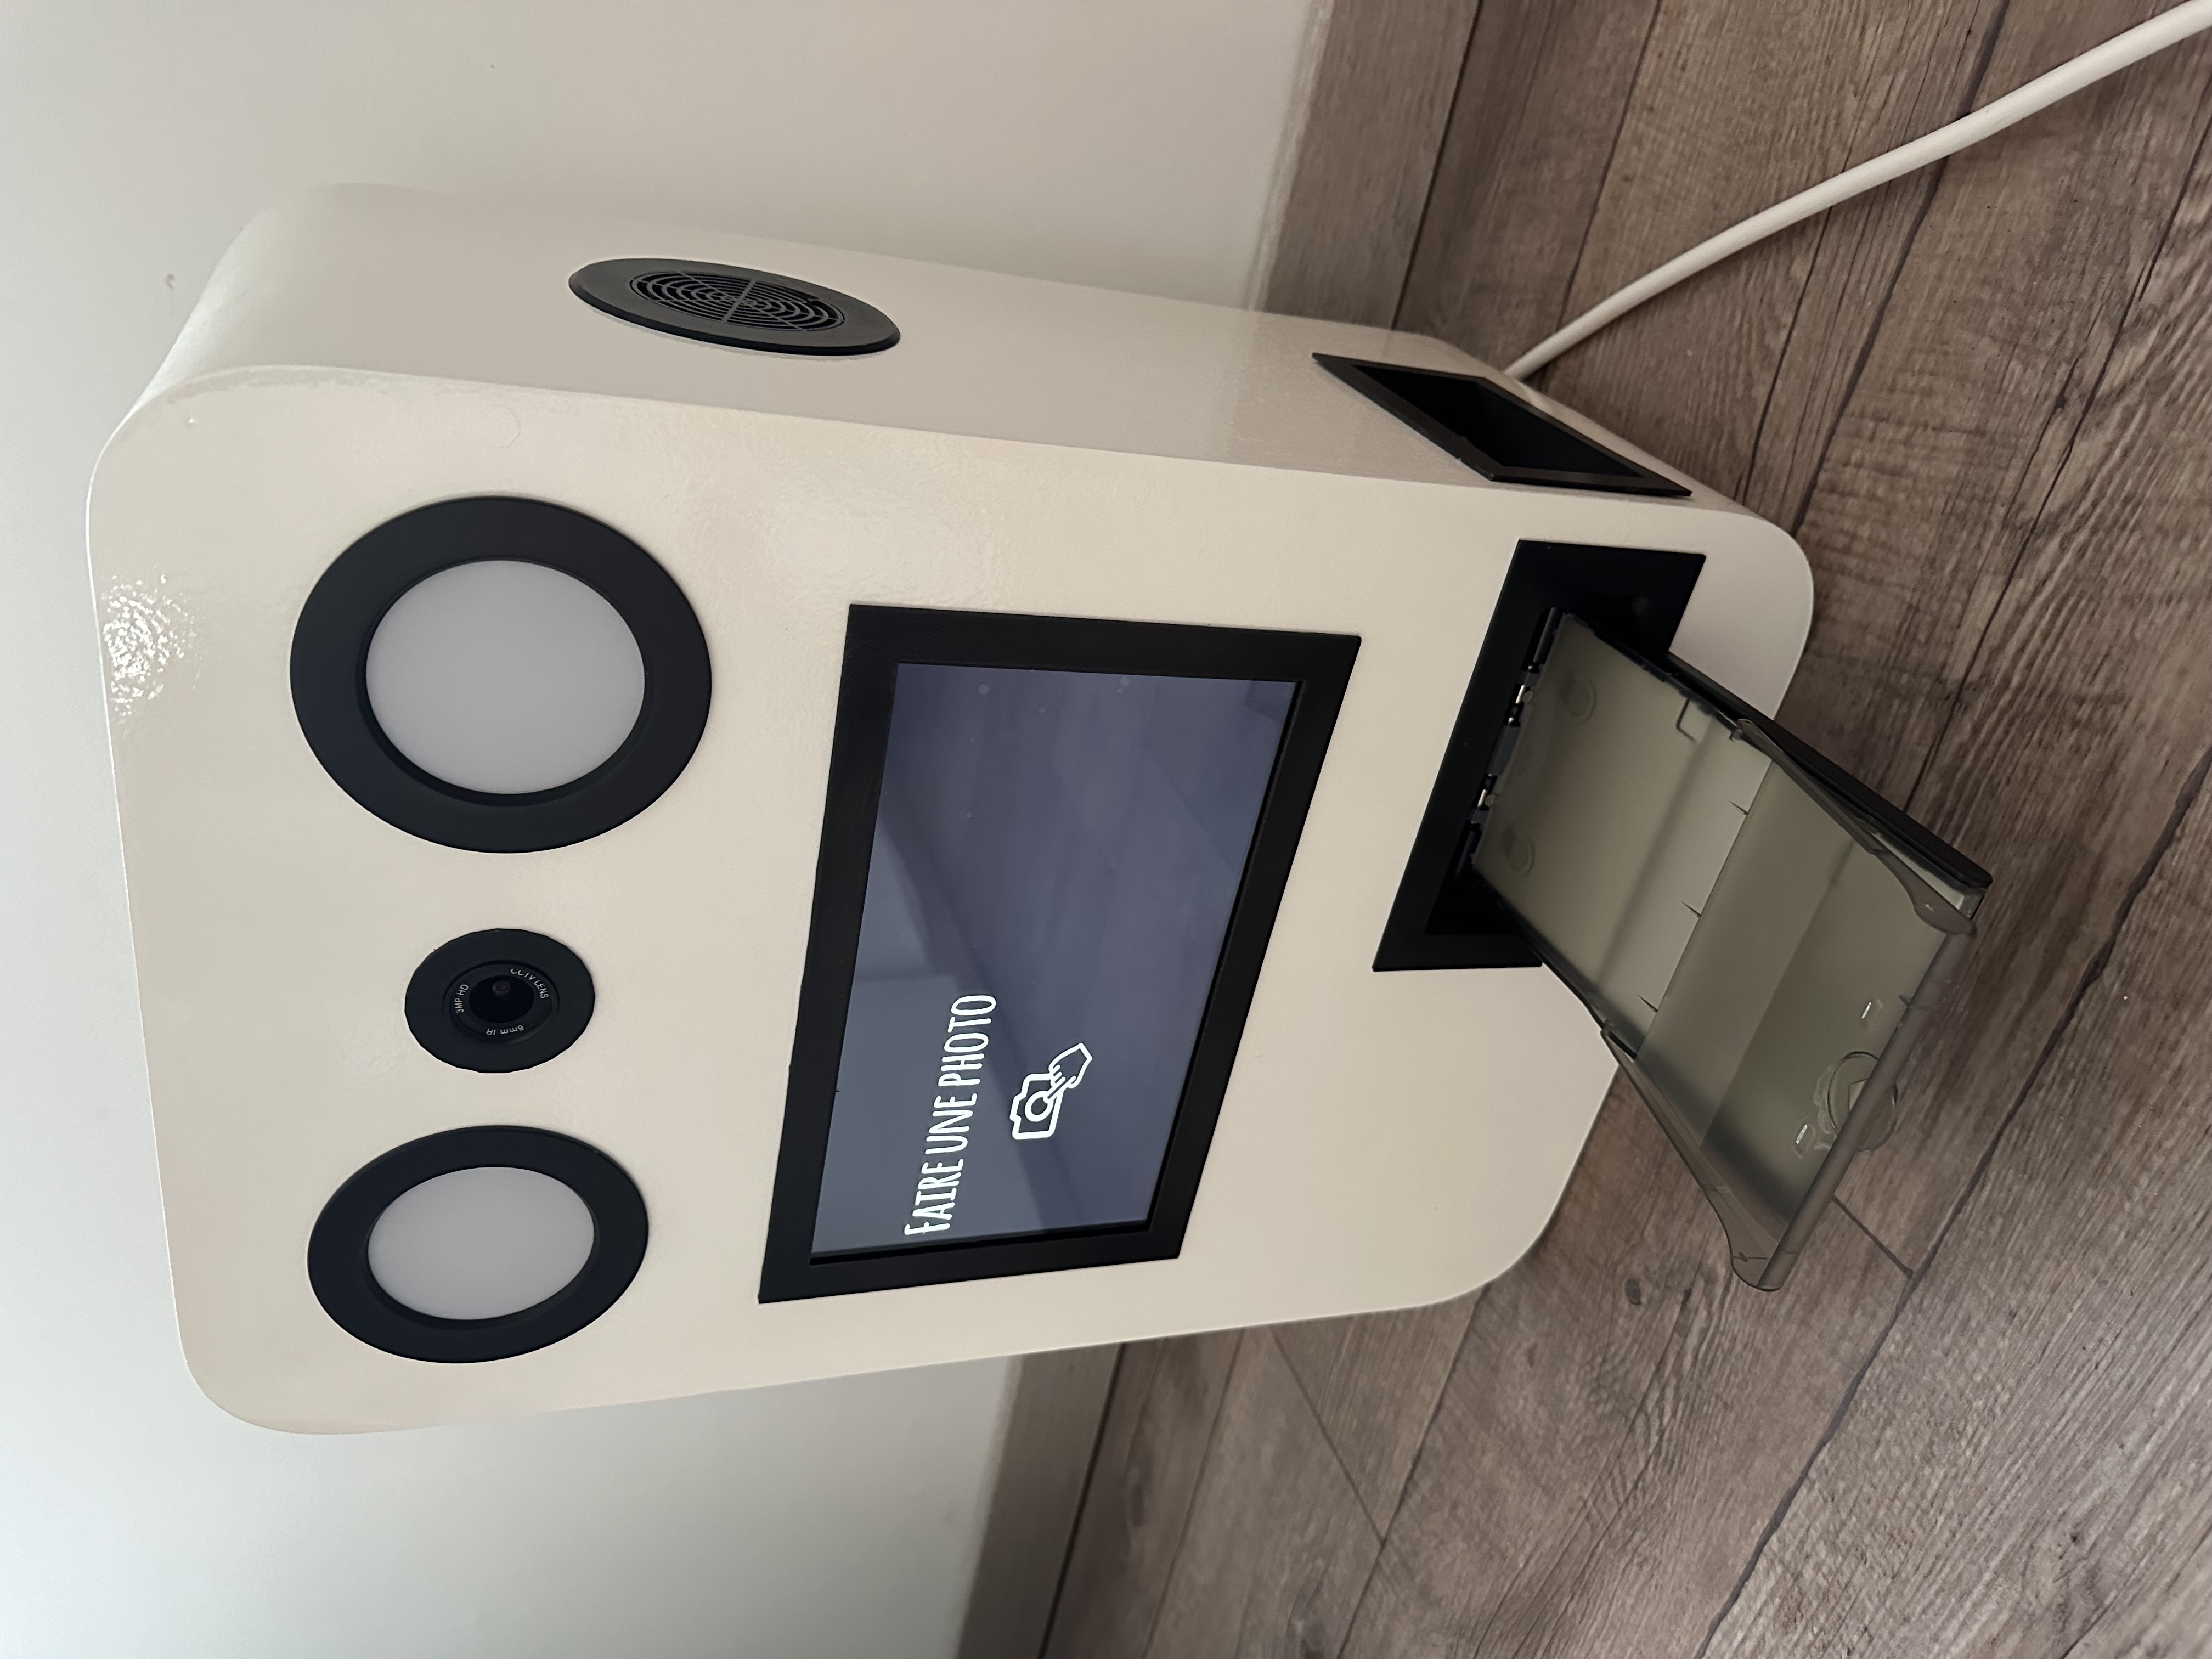
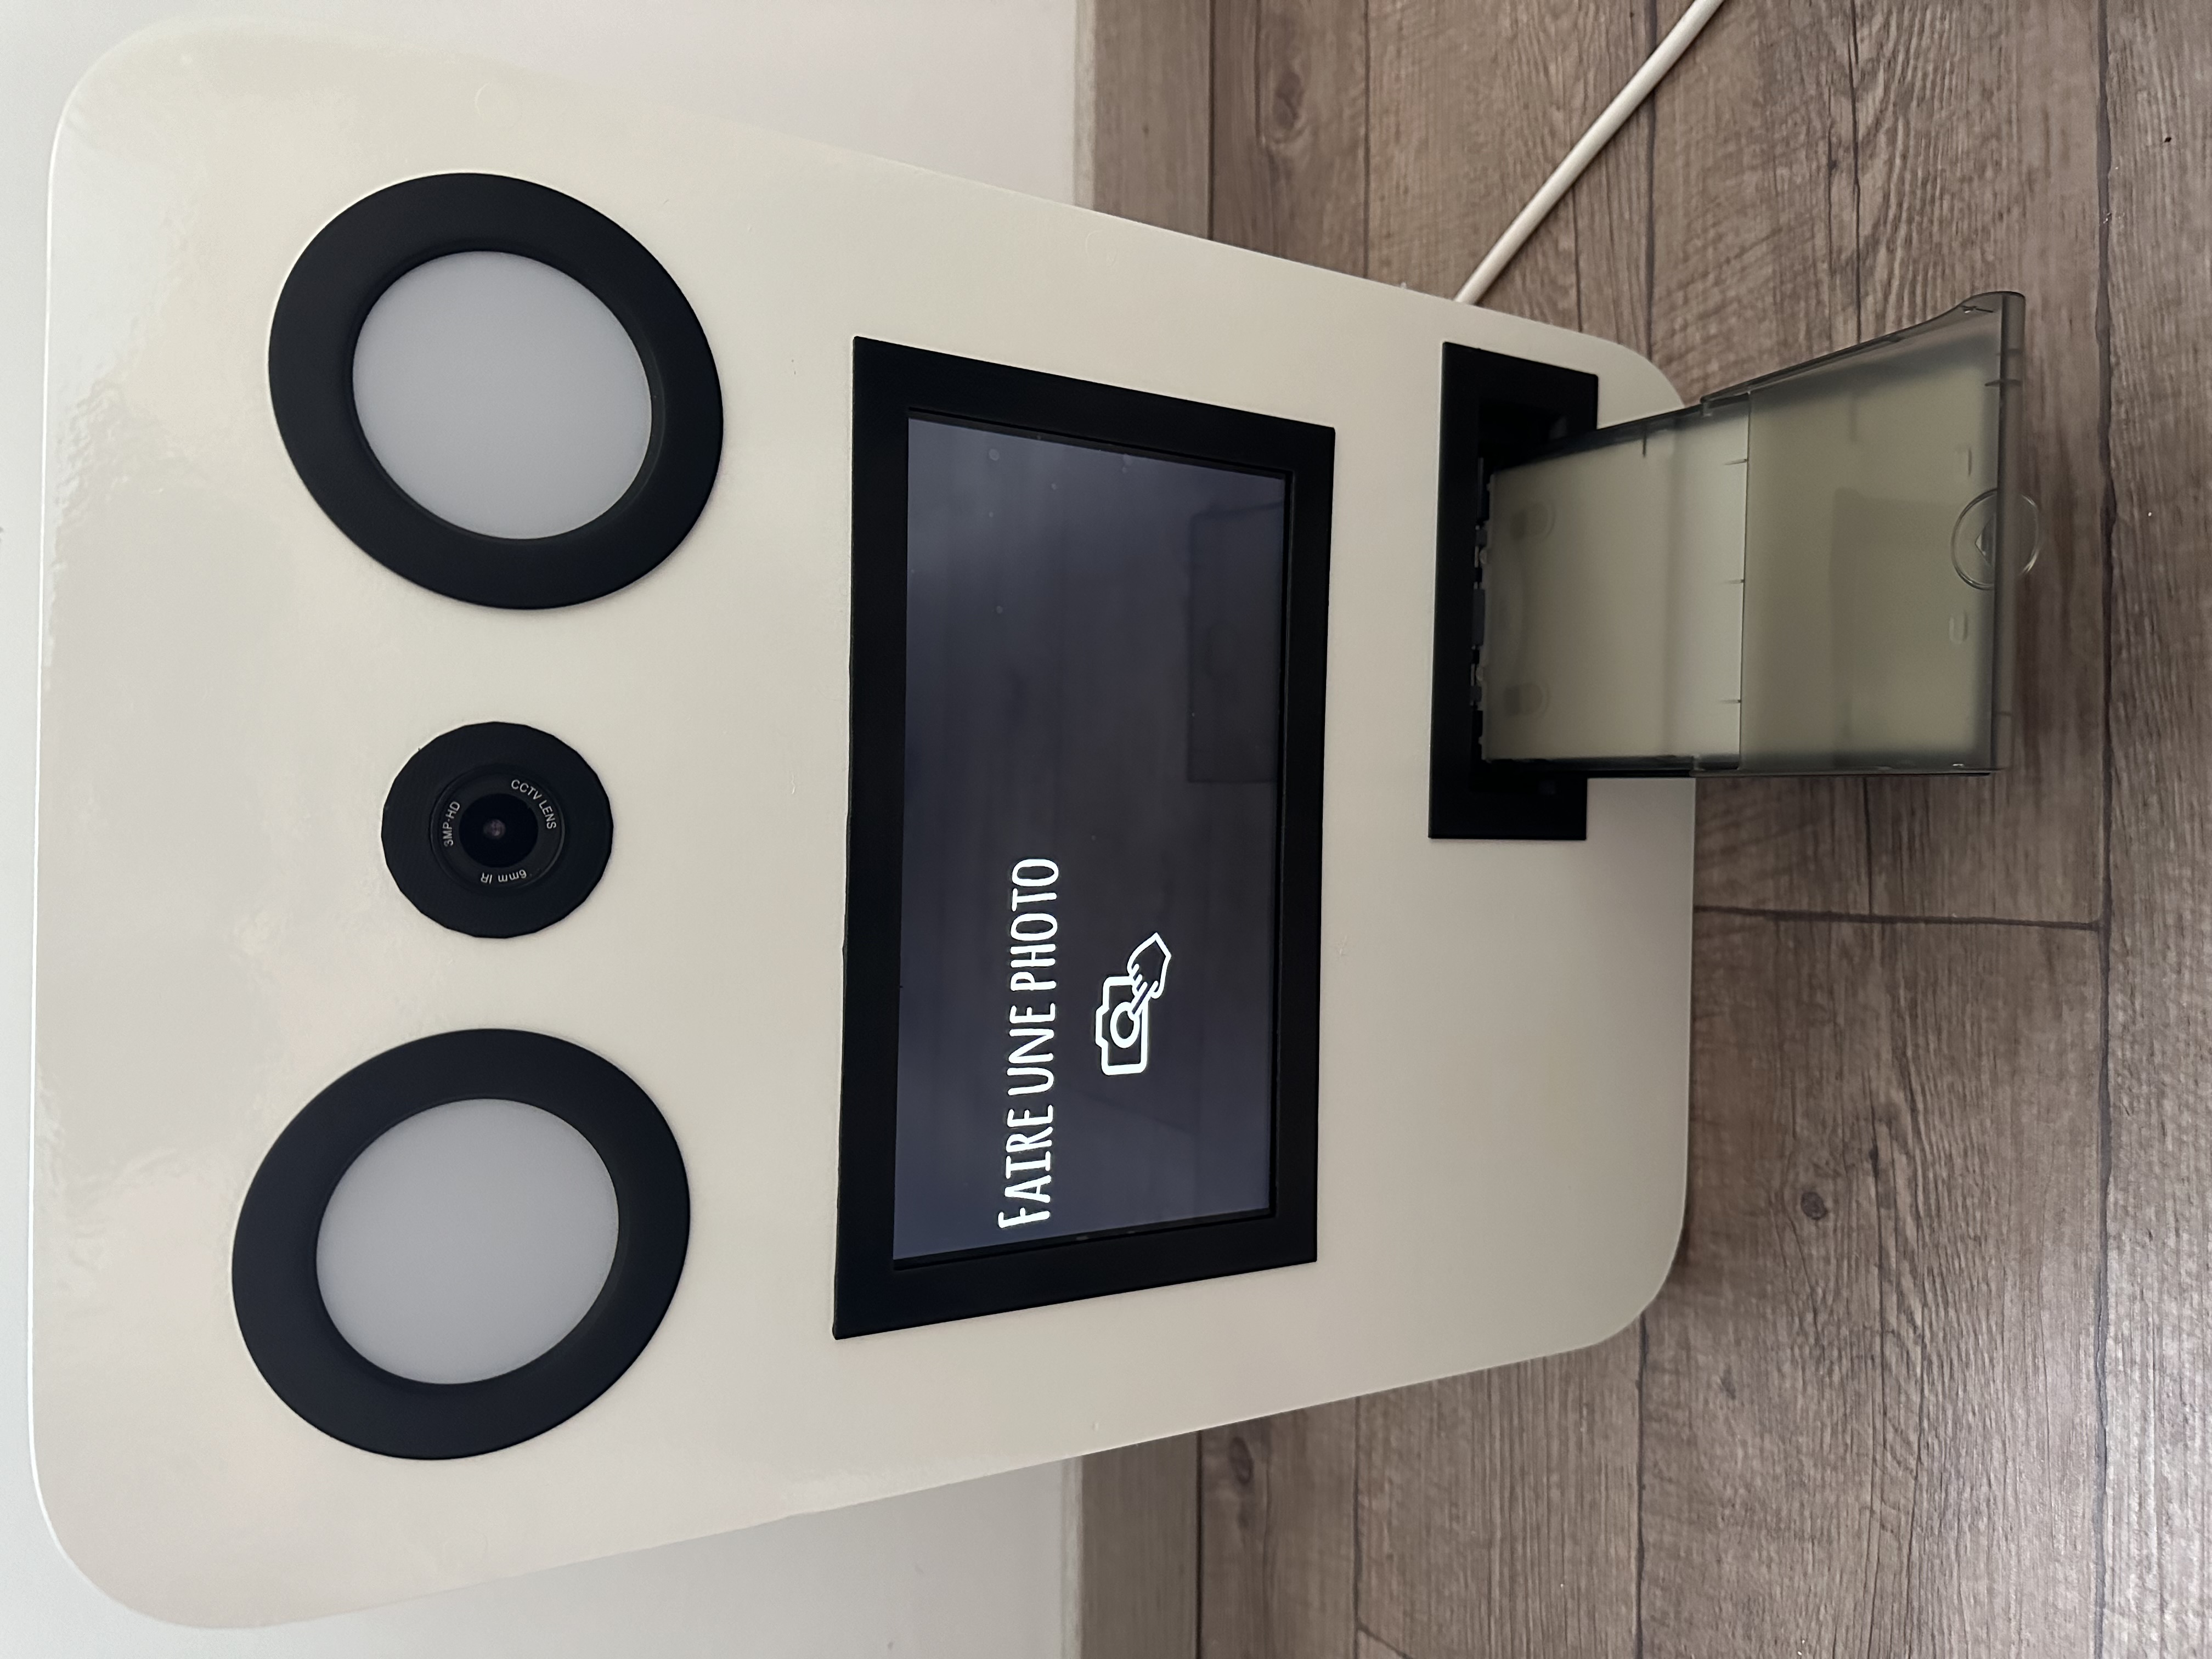
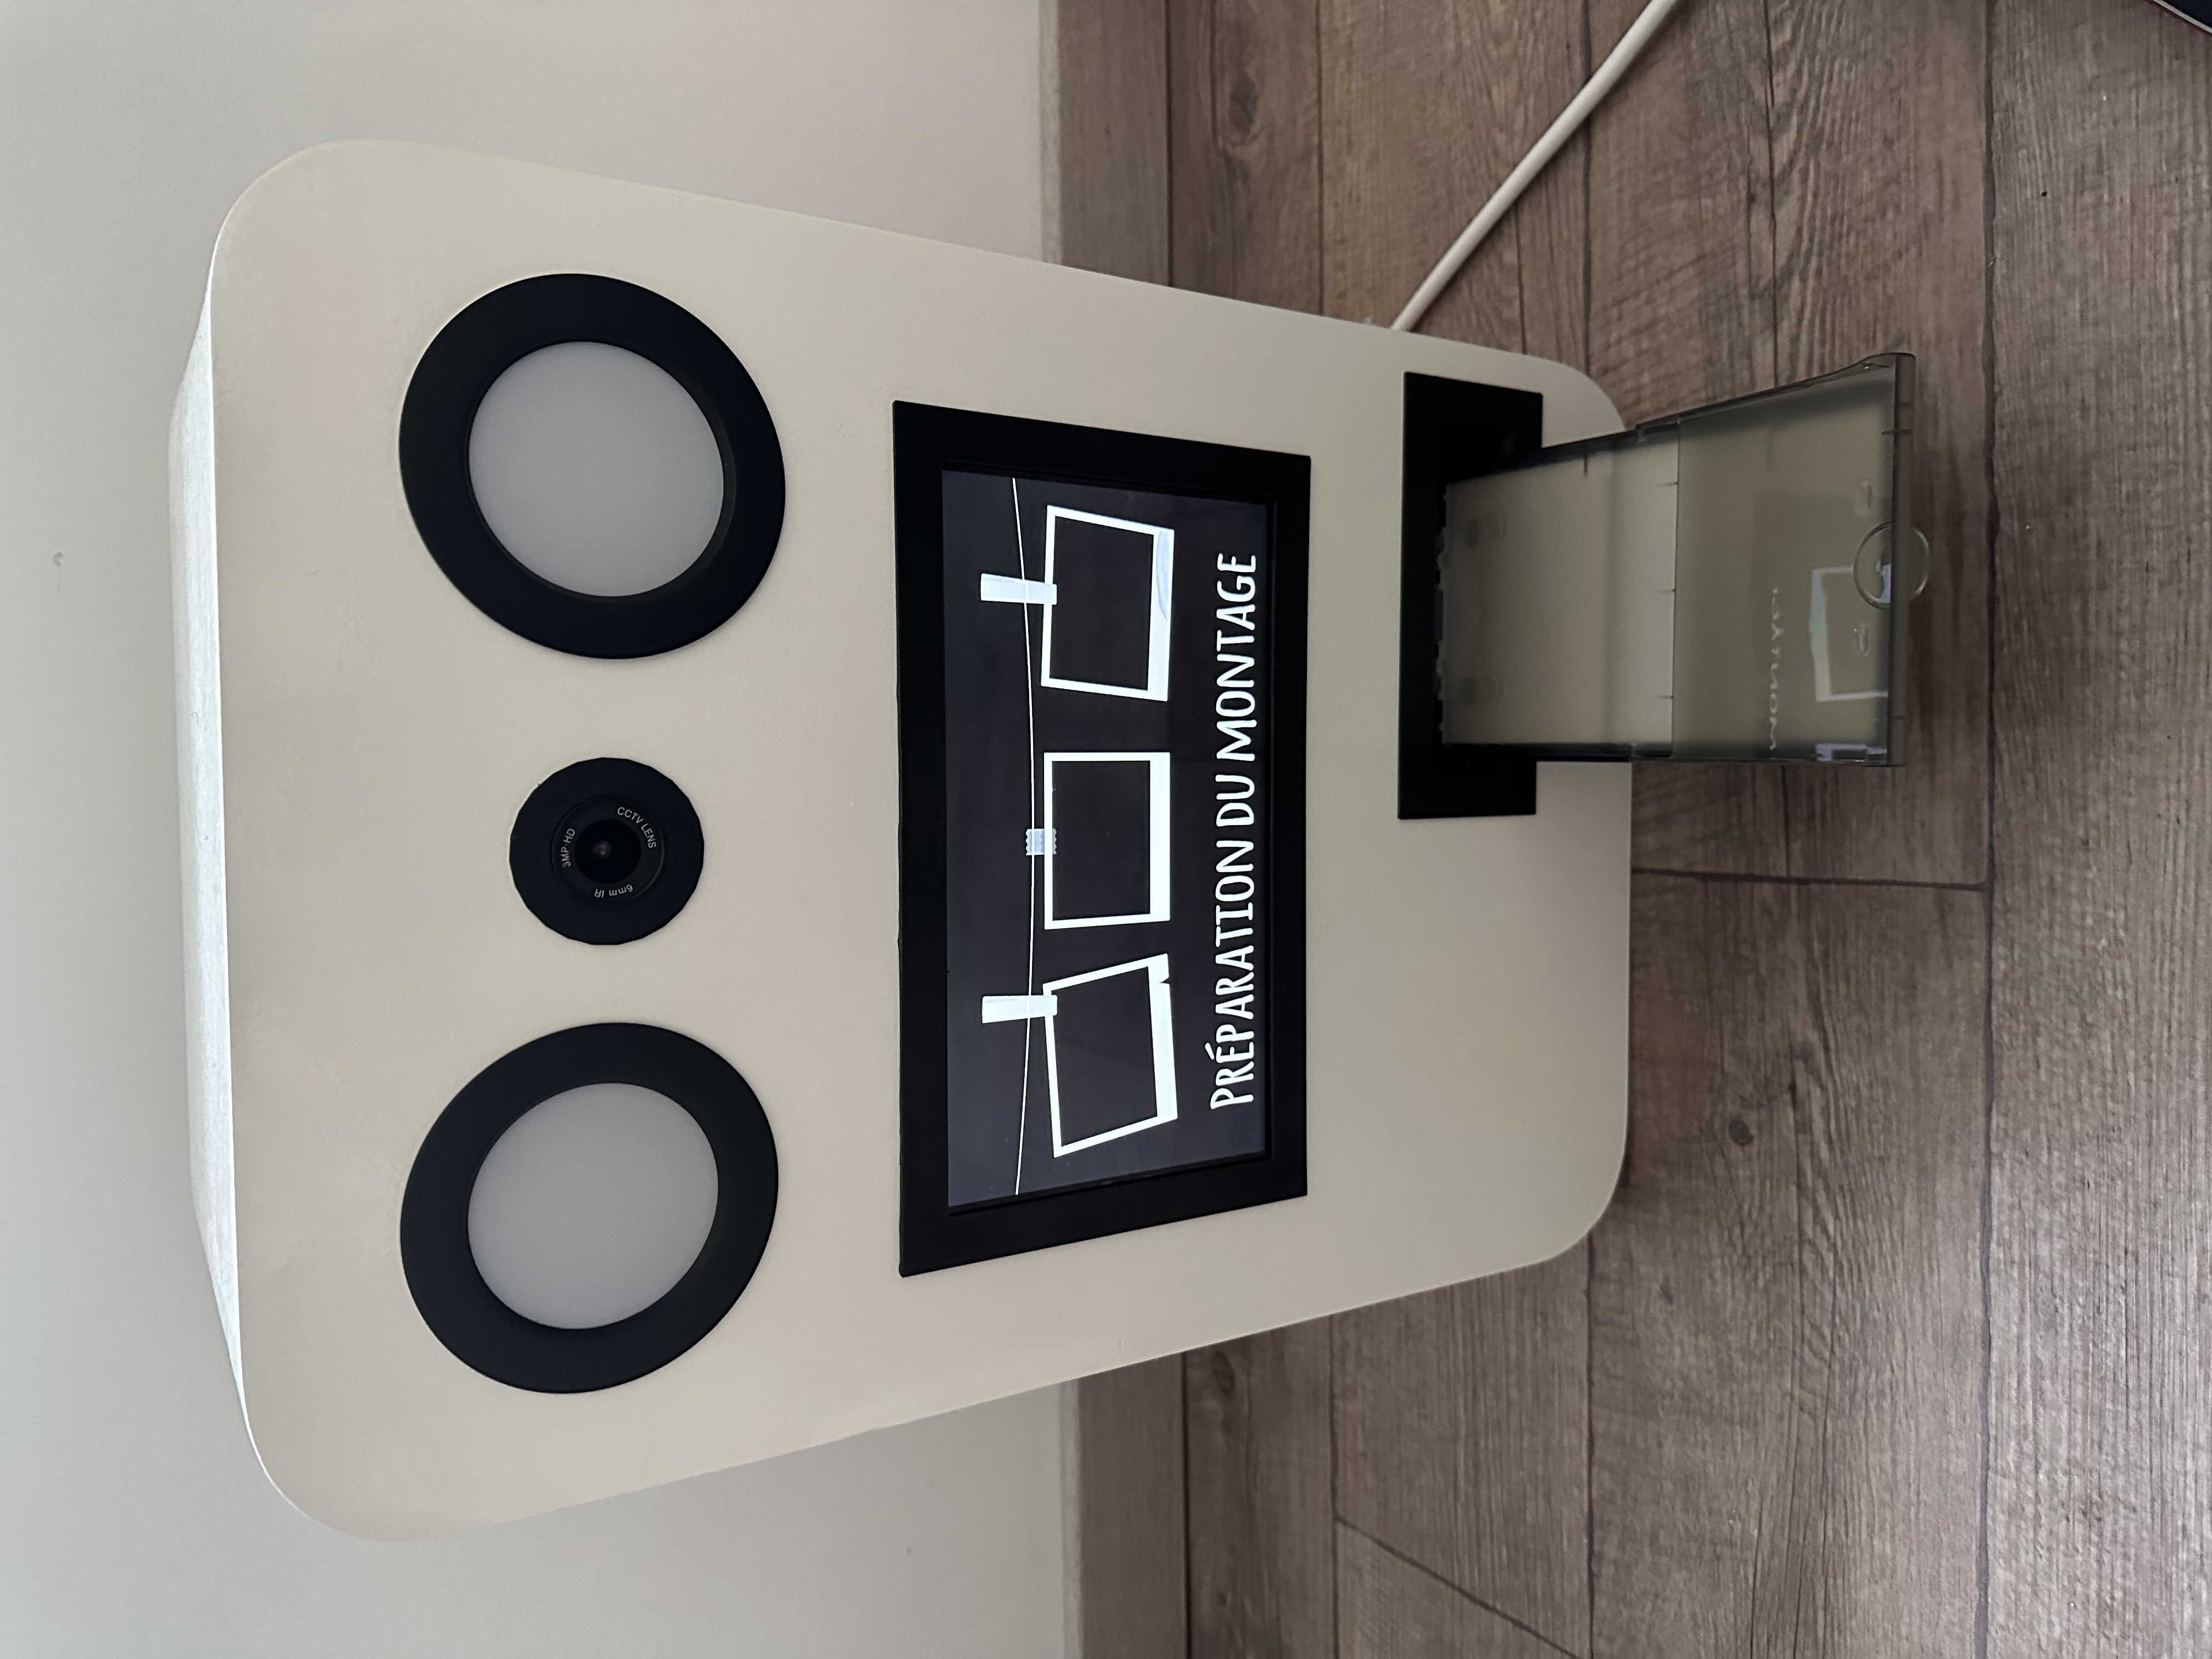
After this long building road, it’s time to test the Photobooth by taking sample photos and printing them. Adjust settings as needed to ensure optimal photo quality and performance.
Some pictures on how it looks when the photobooth is powered on:


Conclusion
Building a DIY Photobooth with Pi is a rewarding journey that culminates in creating cherished memories. The road to build it in this way was long, especially to have this enclosure not very simple get, but it worth ! It’s a unique experience that adds a touch of whimsy for weddings or any other events !
After the wedding
It was very nice to see the result ! We placed the photobooth in a central area with a “wooden” background. A lot of photos has been taken.
We made the following frames for the pictures: