For some time now, I’ve been hesitating to build a compact connected amplifier that offers swift and effortless switching between my various devices such as the TV, smartphones, and more. The idea sprang from a desire to streamline my entertainment setup, eliminating the hassle of constantly reconnecting cables or fumbling with multiple remote controls.
Requirements
I’ve decided to embark on this project with the following objectives:
-
Power Output: The amplifier should deliver a power output of approximately 100W or more.
-
AirPlay Integration: It must incorporate AirPlay functionality to stream audio from iOS/Mac devices to the amplifier seamlessly.
-
Input Ports: The amplifier should feature four input ports: TV, PC, AirPlay, and a front-facing jack for connecting any device conveniently.
-
Remote Operation: The device should be capable of remote power on/off operations via PC/Mac, iOS devices, or the SIRI voice assistant.
-
Remote Input Selection: Users should be able to remotely select the input source to be amplified.
-
Cooling System: Optionally, a cooling system for the amplifier’s power section should be considered if overheating occurs.
-
Expansion Flexibility: The amplifier should allow for future expansion, such as adding an equalizer module.
-
Enclosure Material: The entire setup must be housed within an aluminum enclosure for durability and aesthetics.
Hardware
Audio Amplifier
I had investigating extensively on whether to build an amplification board before discovering what Audiophonics had to offer. The company provides a wide range of audio equipment, including amplification modules with a very reasonable quality-to-price ratio.
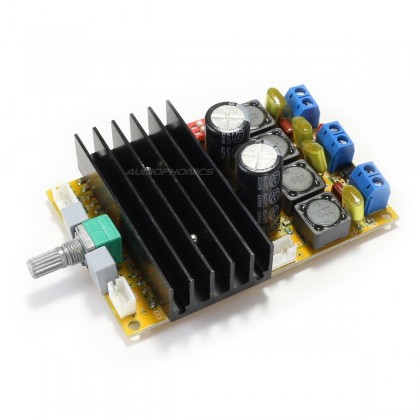
So, I turned to this particular module based on the TDA7498, which enables an output power of 100W. This module offers connectors for power on/off control, power supply terminals, speaker terminals (for power output), and a volume adjustment potentiometer. Additionally, the TDA7498 is designed to be protected against thermal overloads, adding to its appeal.
Input switches
The decision-making process for selecting the input switching method was not straightforward, given the various available options such as transistors and optocouplers.
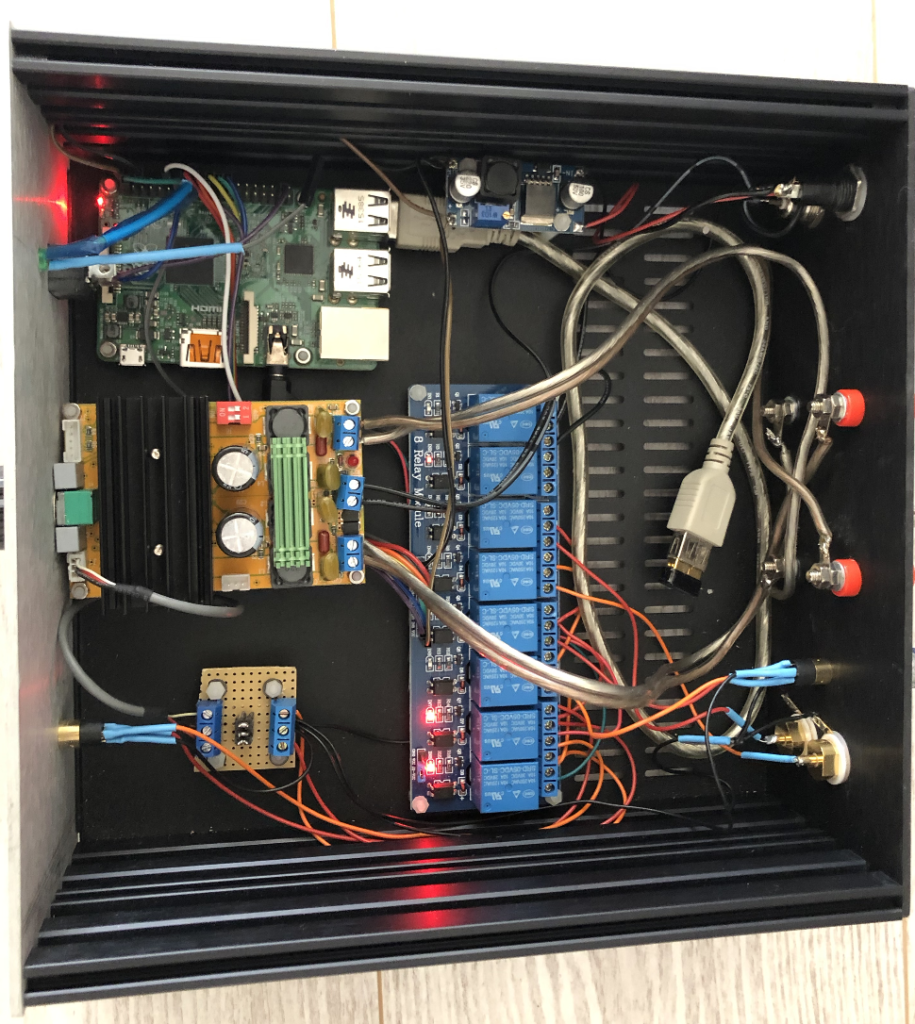
After considering my available resources, I opted to utilize a relay board that I already had on hand. This board features 8 relays, each operating at 5V:
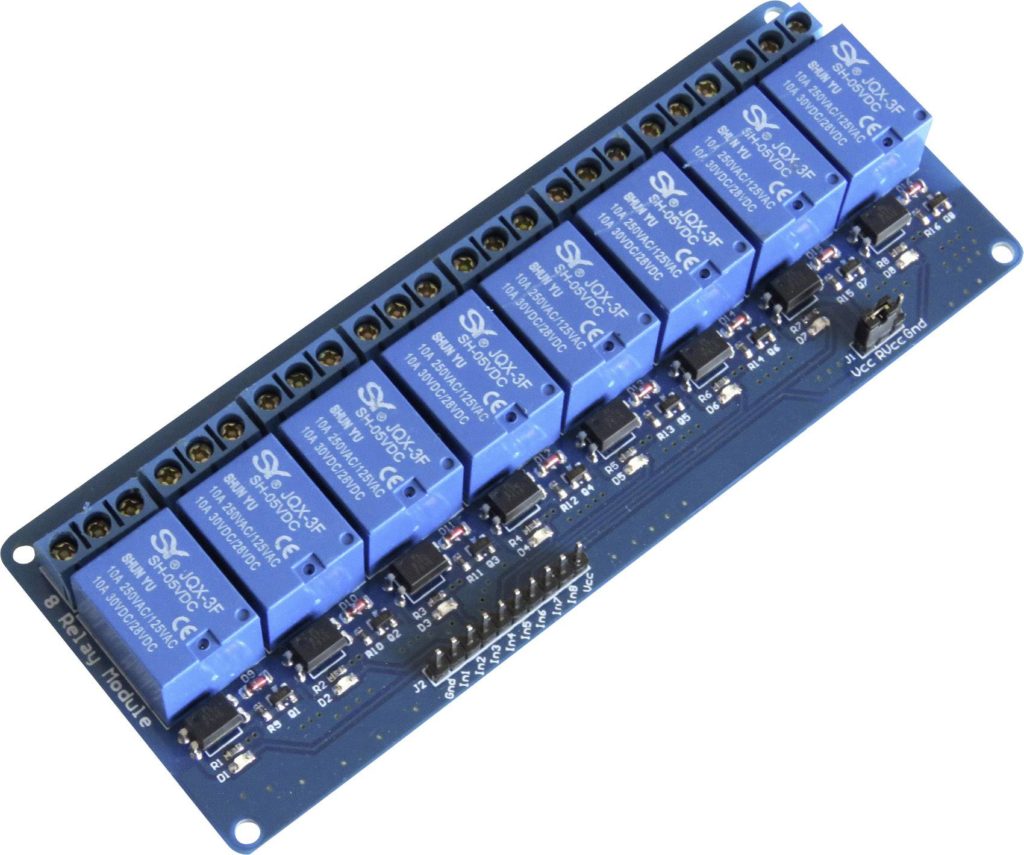
This choice gained further affirmation after conducting an audio test, which revealed no degradation in sound quality when using the relay board. Moreover, its ample relay count makes it suitable for managing all inputs and controlling the amplifier effectively.
Raspberry Pi
To incorporate remote control functionality and AirPlay capability, the Raspberry Pi board offers a simple and efficient solution.
With a Raspberry Pi 2 already available, I opted for this choice, accompanied by a small 8GB SD card, which proves to be more than sufficient for this application.
Enclosure
For the enclosure, it was essential for me to have an all-aluminum construction with a front panel featuring brushed gray aluminum. Therefore, I opted for this particular model, available on the Audiophonics website:
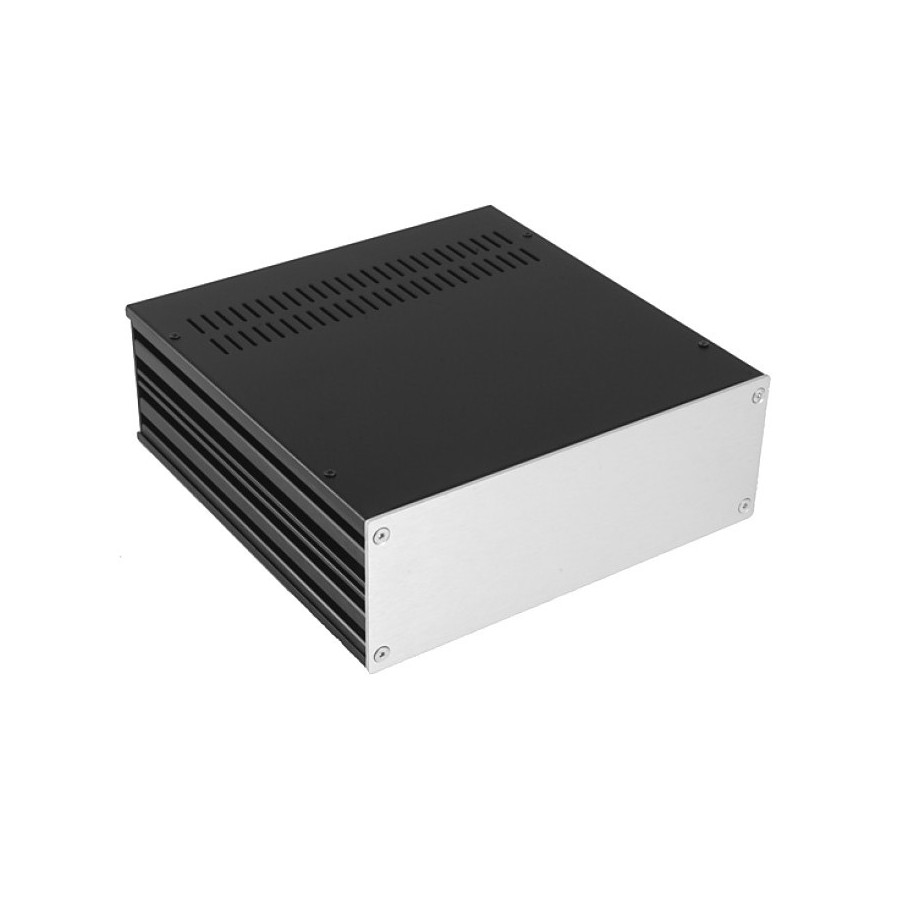
This is the Galaxy GX283 enclosure, measuring 80x230x230. Its size accommodates all the necessary components for the amplifier’s operation while also leaving room for future upgrades. The front panel will be drilled to incorporate volume control buttons, power switch, and also provide a jack input.
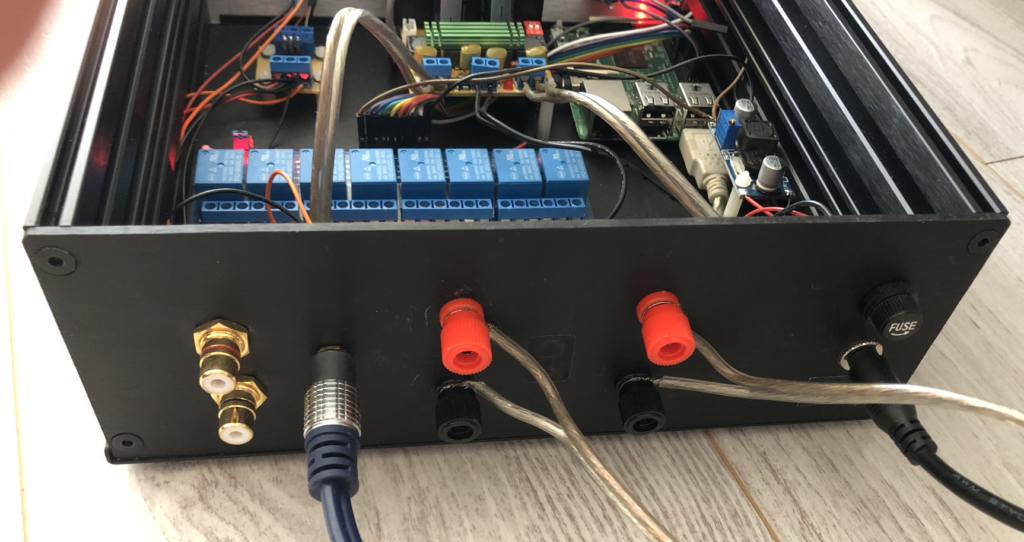
Components, connectors, …
Several other components were necessary for assembling the amplifier, including input connectors (composite and jack), power connector, fuses, and more.
Once again, most of these components are available on the website. Here are the details:
| Référence | Produit | Quantité |
|---|---|---|
| 10274 | Ecrou HU Inox A2 DIN934 M2.5x2mm (x10) | 2 / 2 |
| 3435 | ELECAUDIO ER-101 Embases RCA Vissage extérieur (La paire) | 1 / 1 |
| 12437 | Embase Jack 3.5mm Laiton Plaqué Or | 2 / 2 |
| 11983 | Entretoise Nylon M2.5x20mm Mâle / Femelle (x10) | 1 / 1 |
| 10275 | Entretoise Nylon M2.5x5mm Mâle / Femelle (x10) | 1 / 1 |
| 12141 | FX-AUDIO M-DIY V4 TDA7498 Module Amplificateur Class D 2x80W 8 Ohm | 1 / 1 |
| 1125 | HIFI 2000 Boitier Galaxy GX283 3mm 80x230x230 | 1 / 1 |
| 11227 | Pied ABS finition Silver 40x10mm (Unité) | 4 / 4 |
| 11552 | Vis Tête Fraisée ACIER 10.9 BTR M2.5x5mm (x10) | 1 / 1 |
These components will ensure a sturdy and functional amplifier assembly, ready to meet the desired specifications.
Software
Here is the minimalist web interface for controlling the amplifier:

This interface was developed using the following tools:
- Node.JS
- Micro-Framework Express.JS
- NPM package rpi-gpio for controlling the relay board and thus the different inputs
- Materialize framework for the Frontend
This combination of tools enabled the creation of an intuitive and efficient interface for managing the amplifier’s functionalities in a practical and accessible manner.
Automatic Startup
To avoid manual intervention each time the amplifier is powered on, these steps automatically run the web server at Raspberry Pi startup:
- Create a service that will execute at Raspberry Pi startup, located at
/etc/systemd/system/gui-amplifier.service:
[Unit]
Description=gui-amplifier

[Service]
ExecStart=<path_to_project>/app.js
Restart=always
Environment=PATH=/usr/bin:/usr/local/bin
WorkingDirectory=<path_to_project>

[Install]
WantedBy=multi-user.target
- Enable and start the service:
systemctl daemon-reload && systemctl start gui-amplifier.service
- Apply the changes on startup:
systemctl enable gui-amplifier.service
Installing Shairport
Shairport is the tool used to turn the Raspberry Pi or any other Linux device into an Airplay server. Here’s how to install it:
- Update Packages
sudo apt-get update

sudo apt-get upgrade
- Install Compilation Prerequisites
sudo apt-get install autoconf automake avahi-daemon build-essential git libasound2-dev libavahi-client-dev libconfig-dev libdaemon-dev libpopt-dev libssl-dev libtool xmltoman
- Clone Shairport from GitHub Repository and Install It
git clone https://github.com/mikebrady/shairport-sync.git

cd shairport-sync

autoreconf -i -f
./configure --with-alsa --with-avahi --with-ssl=openssl --with-systemd --with-metadata

make

sudo make install
- Enable Automatic Startup
sudo systemctl enable shairport-sync

sudo service shairport-sync start # Direct Startup
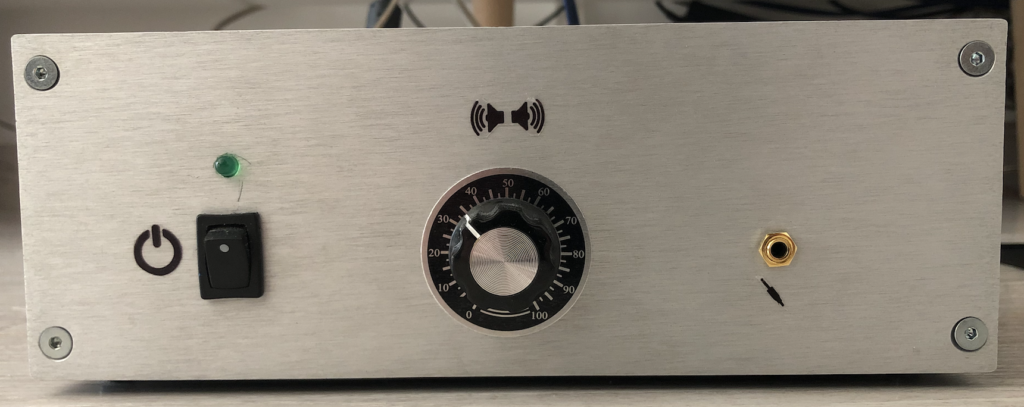
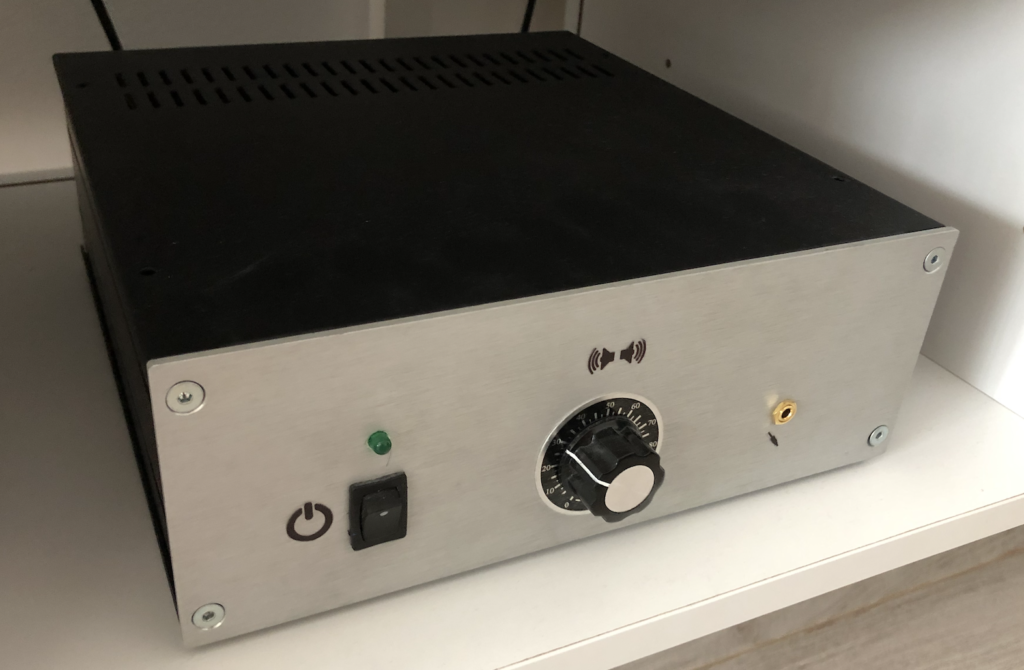
Result
Some pictures bellow shows the final result after assembling components & developping software part: